Backpacking the Rae Lakes Loop is one of the crown jewels of Sierra Nevada hiking. Over 40 miles, it traverses rushing streams, lush fern forests, high alpine meadows, jagged peaks, and some of the most spectacular Sierra backcountry scenery imaginable.
Part of the route joins the John Muir Trail and Pacific Crest Trail, where you’ll share the path with long-distance backpackers up and over Glen Pass.
Most hikers take 4 days to comfortably complete the Rae Lakes Loop. Some will add an extra “zero day” in the middle of the trek, lingering by one of the pristine alpine lakes or exploring off-shoot trails, while still other (ambitious) hikers will finish the loop in under 4 days.
For the sake of the average backpacker, this itinerary details a 4-day trip in the more popular “clockwise” direction.
Distance: 41.4 miles
Recommended Time: 4 days, 3 nights
Elevation Gain: 7,000 feet (from 5,000' feet at the trailhead to 12,000' over Glen Pass and back down)
Permit Required: Yes, during quota season (May 22 - Sept. 26, 2026)
Jump to:
- Overview
- Permits
- Location and Trailhead
- What to Pack for Rae Lakes
- Where to Stay the Night Before Your Hike
- Day #1: Trailhead to Upper Paradise Valley
- Day #2: Upper Paradise Valley to Middle Rae Lake
- Day #3: Middle Rae Lake to Junction Meadow
- Day #4: Junction Meadow to trailhead
- Wildlife and Safety
Rae Lakes Loop: Overview

Anyone attempting the Rae Lakes Loop should be in decent physical shape. You’ll need to hike up to 12 miles a day, with an overnight pack, at high altitude.
At the same time, anyone with comfortable fitness should not be intimidated. Even those who have never done an overnight backpack before have completed Rae Lakes without any problem.
The loop can be completed either clockwise or counterclockwise:
- Woods Creek (clockwise) is more gradual, summiting Glen Pass on day #3
- Bubbs Creek (counterclockwise) has a steeper ascent to summit Glen Pass on day #2, with a more gradual descent
Most people prefer the clockwise direction, giving an extra day to acclimatize before reaching the Glen Pass summit. However, if you’re prone to knee injuries, you may prefer counterclockwise to lessen the impact of a steeper descent.
Rae Lakes Permits
All hikers on the Rae Lakes Loop must have a wilderness permit.
There are two permit options available: Woods Creek (clockwise direction) and Bubbs Creek (counterclockwise).
How to Reserve a Permit
There are different regulations for hiking during quota season vs. off-season. In 2026, quota season runs May 22 – Sept. 26.
Quota Season (May 22 – Sept. 26, 2026)
Permits go online at 7 a.m. Pacific time each day, exactly six months from your start date. They cost a flat $15, plus $5 for each person in your party, and typically sell out immediately, due to high demand.
Each day, a total of 40 permits are released, with 20 for the clockwise direction and 20 for the counterclockwise direction.
Plan to be online with a few minutes to spare, six months from your expected start date. For example, if you’re planning to start your hike on July 30, be ready to grab permits at 6:55 a.m. on January 30.
The morning your reservation window opens, go to recreation.gov’s Sequoia and Kings Canyon National Park Wilderness Permits page. Select “Explore Available Permits” and scroll down to choose either Woods Creek or Bubbs Creek from the list below.
Outside Quota Season (Sept. 28, 2025 – May 21, 2026 and Sept. 27, 2026 – May 20, 2027)
Permits during off-peak season are free, self-issued, and not limited to daily quotas. Simply pick up a permit at one of the park visitor centers when you arrive.
Note: if you’re planning to hike outside quota season, pay extremely close attention to the weather forecast before you go. With high elevation and challenging backcountry terrain, weather conditions are frequently dangerous outside the summer months. Always check with a ranger before starting your trip.
Didn’t Get a Permit?
If you didn’t get a permit during your preferred dates, keep checking back! People often release permits, which are then reposted on the same Wilderness Permits page as they become available.
In the past, we’ve had luck snagging re-released permits even a few weeks out from our travel dates.
There are also (5) walk-up permits reserved for any given day, which you can obtain at the Roads End ranger station, starting at 1 p.m. the day before.
However, trying for a walk-up permit is not recommended. Rae Lakes is in high demand during quota season, and it’s a long drive home if you come away empty-handed.
Picking Up Your Permit
Pick up your permit at the Roads End Wilderness Permit Station (directions), either the afternoon before or morning of your hike. You’ll need to go through a brief 5-minute safety talk with the ranger, before signing out your permit and hitting the trail.
Rae Lakes Loop Location and Trailhead

The Rae Lakes Loop trailhead is located at the Roads End Wilderness Permit Station (directions), where Highway 180 dead-ends in Kings Canyon.
There is a paved parking lot where trekkers can leave their vehicles while completing the loop. The lot is shared with day-hikers, but parking should not be an issue. If you’re hiking the full loop, you should be starting by 9 a.m. anyway (before the lot fills up).
The parking lot also has bear lockers available, to store anything you’re not taking with you on the trail. Remember, never leave anything remotely scented in your car, including food crumbs and inedible items like sunscreen or lip balm. You don’t want to return to your car after four long days, to find a window broken by a hungry bear.
*Note: while we’ve never experienced it personally, we’ve heard stories of squirrels chewing the underwires on vehicles. The more cautious hiker can consider wrapping the car’s undercarriage with a tarp, for peace of mind.
What to Pack for Rae Lakes
Clothing
In addition to the standard backpacking essentials, the 7,000′ elevation change requires preparation for everything from humid conditions in the fern forests of the canyon floor to chilled nights (even in summer) on the exposed shores of the Rae Lakes.
Prepare for a temperature swing from 40 – 90 degrees Fahrenheit over the course of your trip, and pack accordingly.
Additionally, insects can be really bad here during the summer months, particularly in the humid fern forests at lower elevation. Plan to bring breathable, long-sleeve coverups and plenty of insect repellent. Head nets are also a great “nice to have,” and will save your sanity from ear-buzzers.
Bear Canisters
Bear canisters are mandatory on this trail. (The ranger will ask to see yours, before you leave the trailhead). If you don’t own one, you can rent from REI or similar stores.
While there are bear lockers scattered at campsites along the loop, don’t rely on using them. The canisters quickly fill up each day, and claiming some shared space inside is not guaranteed.
Water Filters
Water is plentiful along the loop, but filtering is required.
We personally like the LifeStraw gravity filter, but any quality water filter will do (the Katadyn gravity filter is a close second for us).
You can also check out our backpacking packing list guide, which includes a downloadable PDF packing checklist, along with tips, hacks, and other recommendations.
Where to Stay The Night Before Your Hike
We strongly recommend getting to the area the day before you plan to start your hike. There are a few campsites within a 10-15 minute drive of the trailhead, including Sheep Creek, Canyon View, and Moraine.
If you want to splurge, you can book a room at Cedar Grove, which sits right on the Kings River. This 2-star hotel is nothing fancy (and rates still run upwards of $250/night in the summer), but it’s still a treat to have a bed and hot shower the night before you head into the backcountry.
There is also a restaurant and grab-and-go market at Cedar Grove that serve breakfast, lunch, and dinner.
Rae Lakes Loop Itinerary
The itinerary below details the more popular clockwise (Woods Creek) direction. If you’re heading up the Bubbs Creek route, simply reverse it.
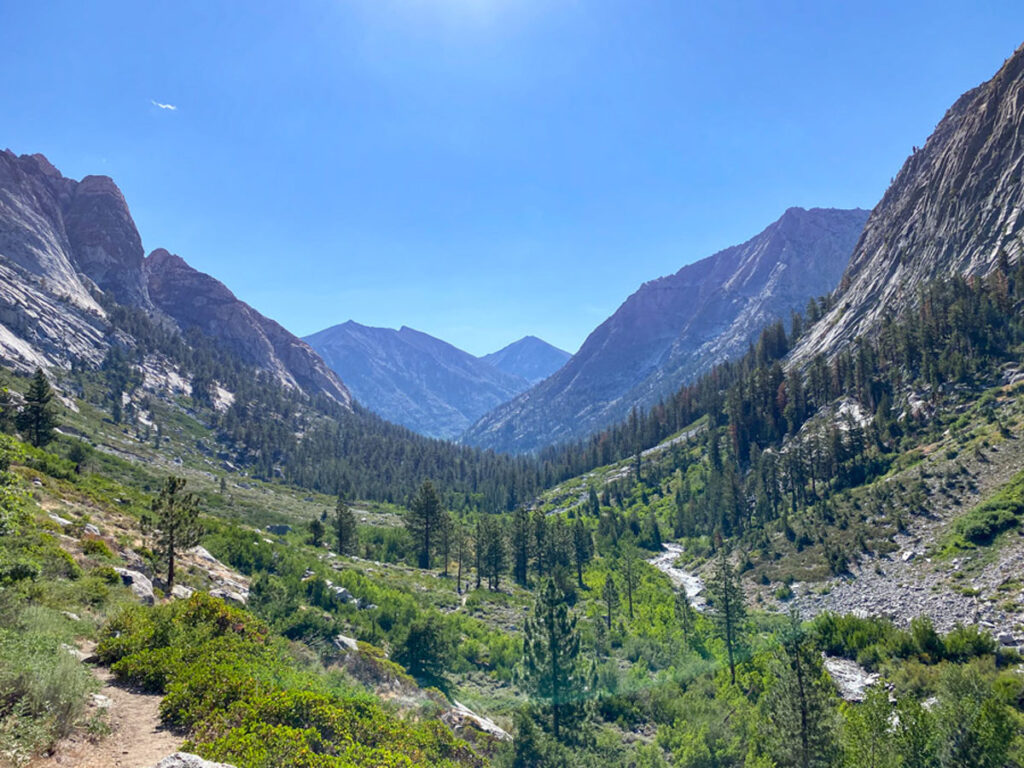
Rae Lakes Loop Day #1: Trailhead to Upper Paradise Valley (10 miles; 1,900′ elevation gain)
Aim to be at the Rae Lakes Loop trailhead by 8 a.m. With a long day ahead, you want to beat the worst heat. (Plus, any permits not claimed by 9 a.m. might be given away to walk-ups!)
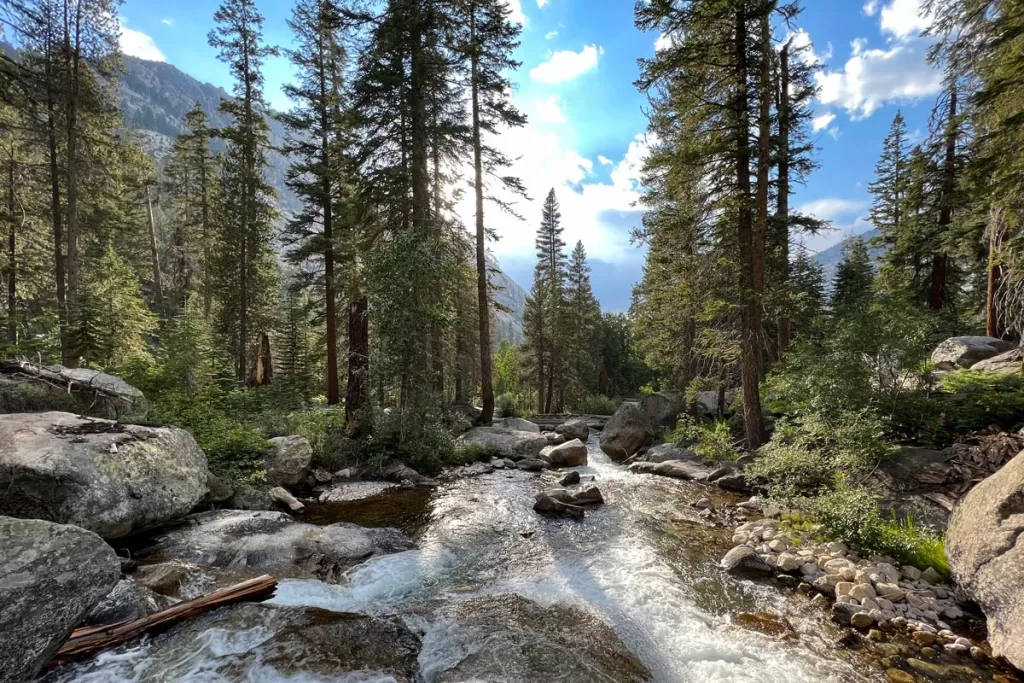
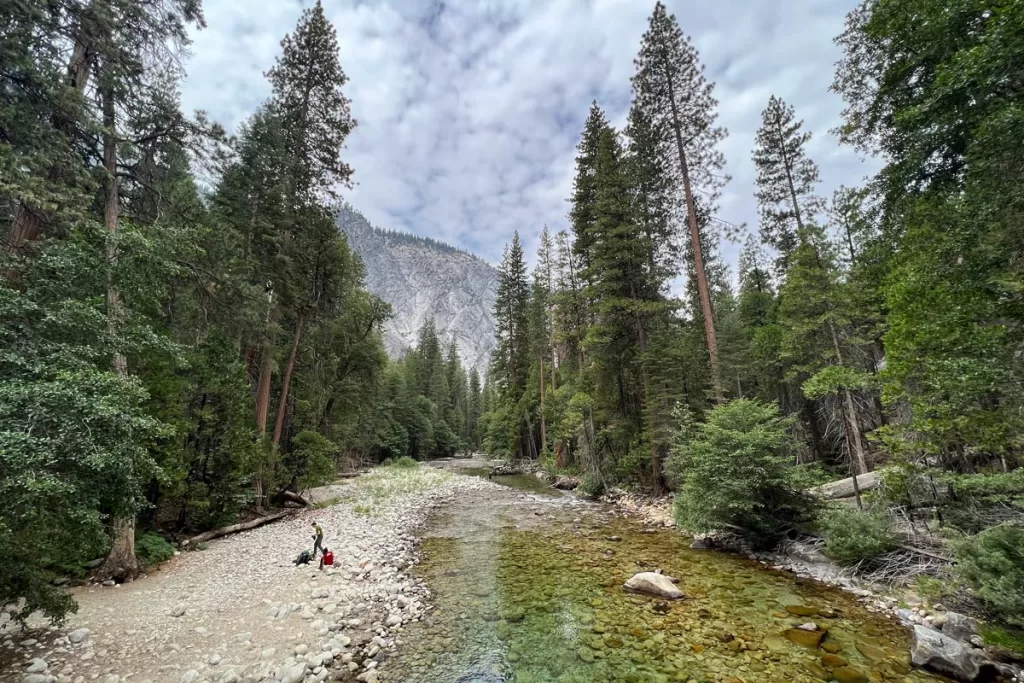
After your safety spiel with the ranger, you’ll set off on approximately 2 miles of sandy trail along the valley floor. Past this stretch, the landscape shifts from open pine to the more dense forest that you can expect for the rest of the day.
Just past 2 miles in, you’ll come to a junction that separates the clockwise hikers from the counterclockwise. Clockwise Woods Creek hikers should take the left fork, and counterclockwise Bubbs Creek hikers take the right.
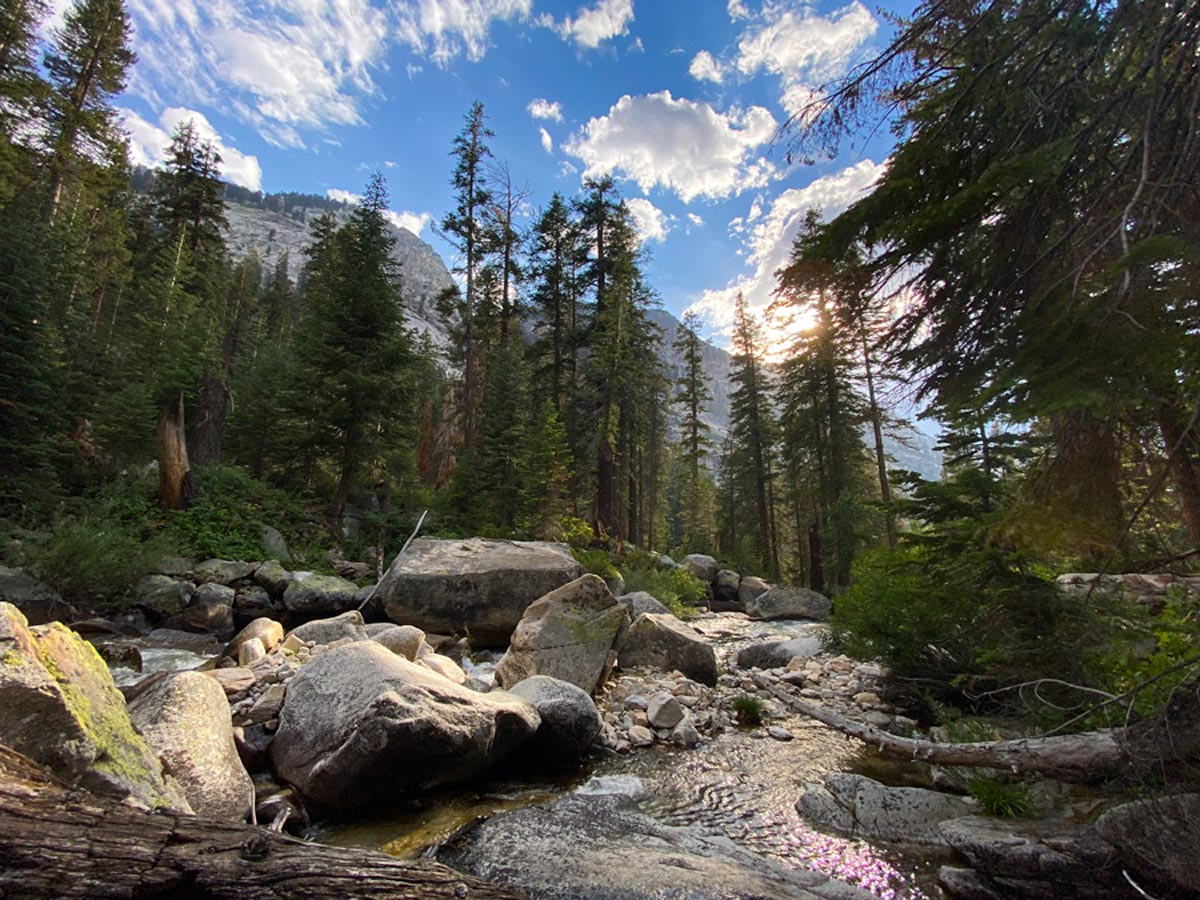
Past the fork, the trail begins climbing as you follow the south fork of the Kings River. You’ll climb a bit, level off, climb some more, level… but always under a shaded forest canopy that provides some heat relief.
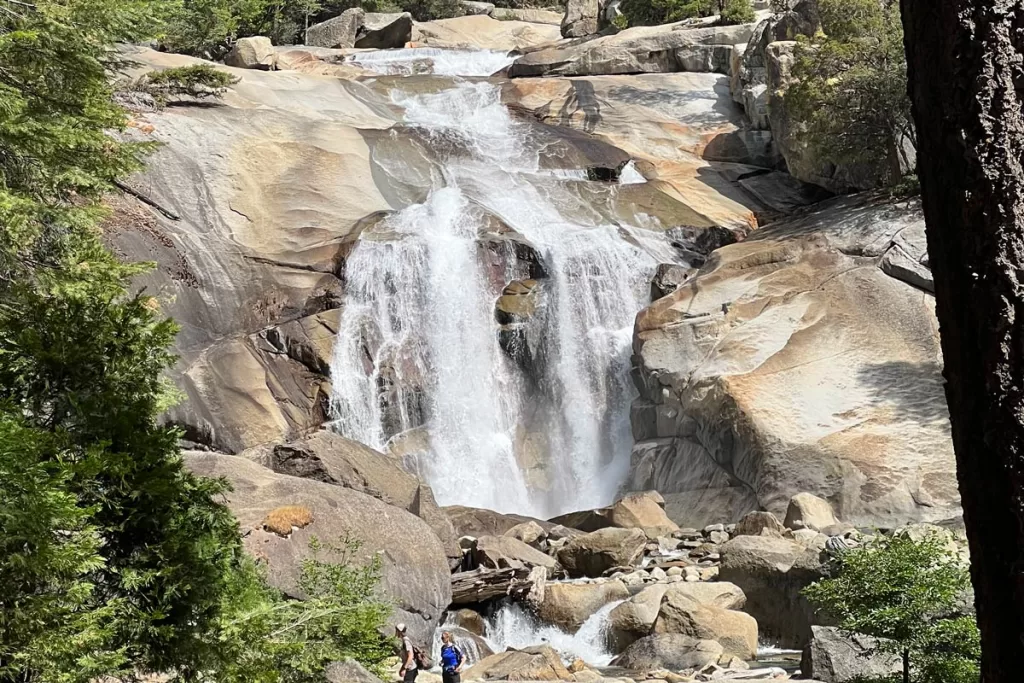
Mist Falls (approximately 4.75 miles in) provides a great respite. Grab a rock, soak your feet, and enjoy a snack with the thundering falls behind you.
Mist Falls is usually the farthest that day hikers will trek, so beyond this point Rae Lakes Loop hikers will start having the trail to themselves.
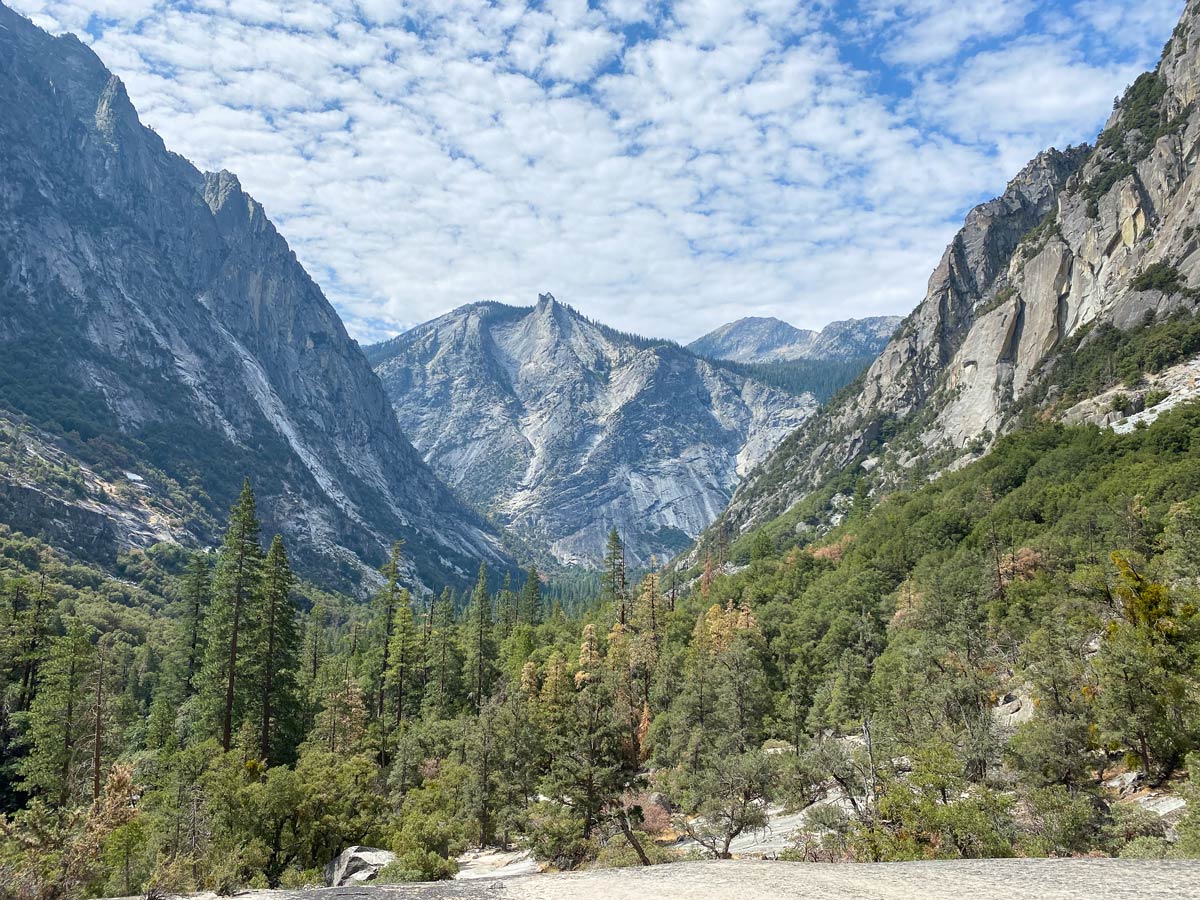
Beyond Mist Falls, the trail opens up to large steps of exposed granite. Expect the heat the rise accordingly. Hiking in late July and August can be scorching through this section.
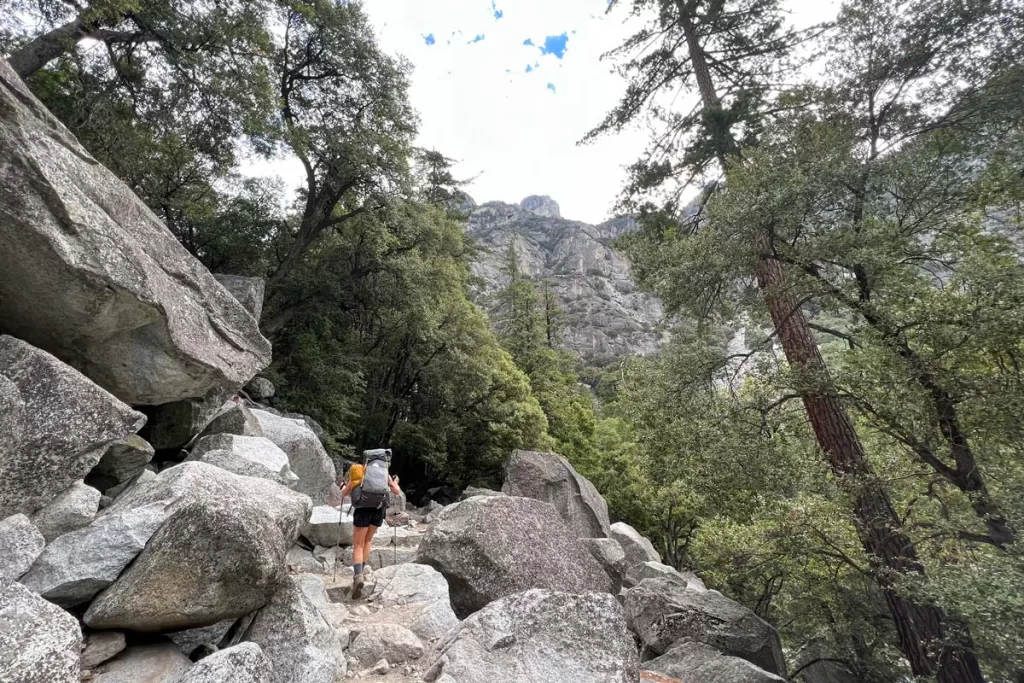
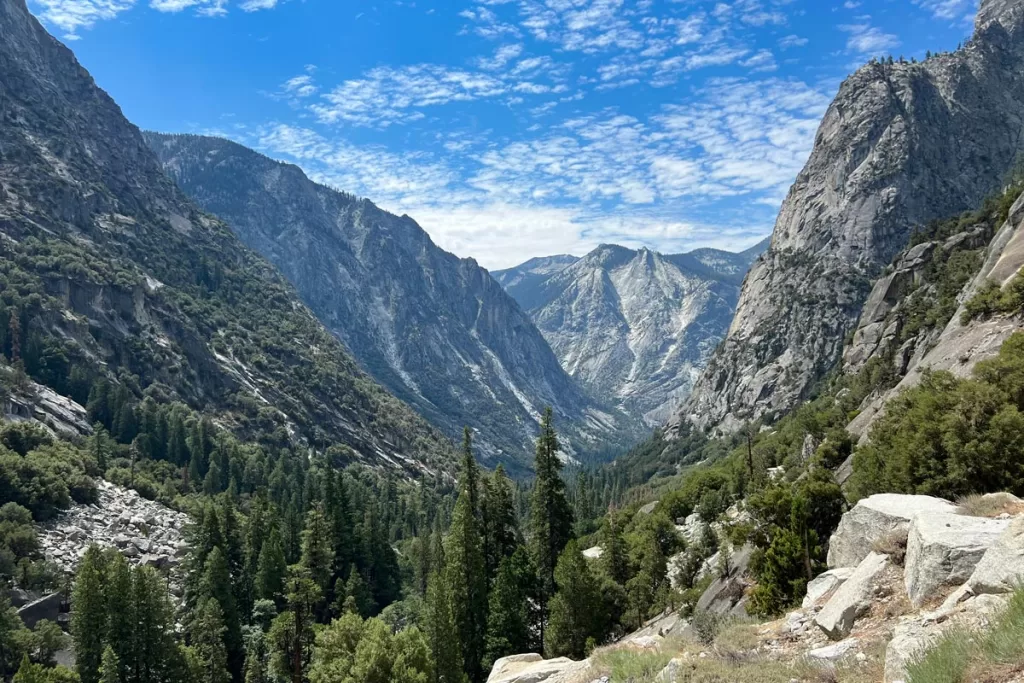
Even if you’re tired, remember to keep looking back behind you, down the gorge to the Sphinx across the valley. This is the first of many breathtaking vistas you’ll get used to seeing over the next few days.
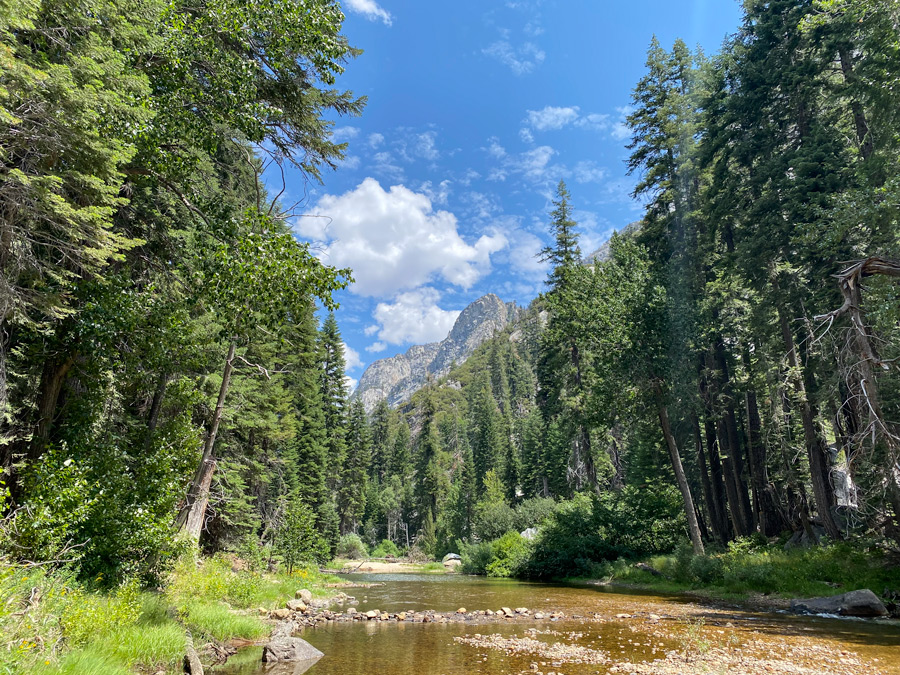
As you press on to Lower Paradise Valley, the trail regains its trees and corresponding shade, and the riverbank of Lower Paradise makes a great spot to stop for lunch and rehydrate.
While it’s tempting to set up camp here, we strongly recommend pushing on to Upper Paradise Valley for the night. You’ll shave off valuable miles tomorrow, the longest day of the trek.
The route to Middle and Upper Paradise Valley will tease, with spurts of shaded cedar and pine forests intermixed with sweltering exposed granite.
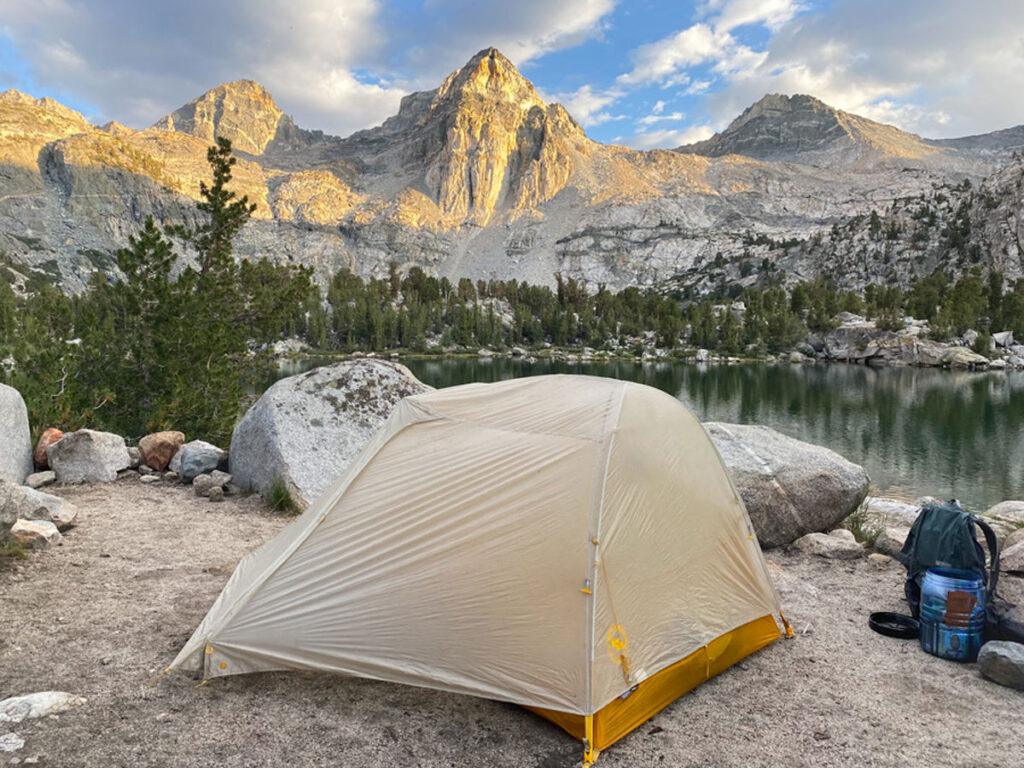
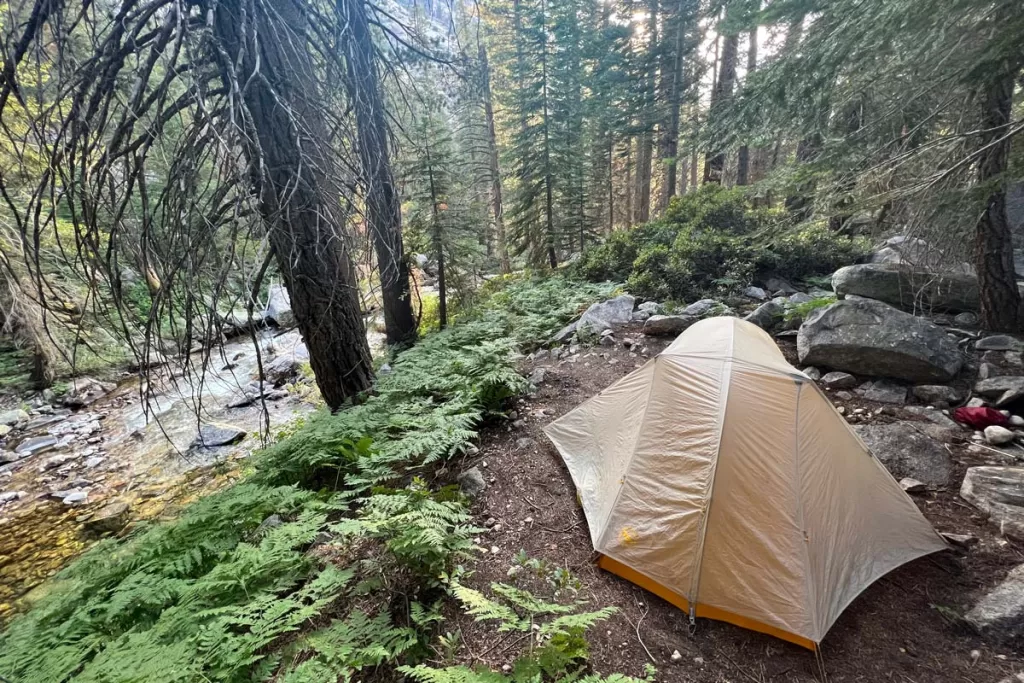
At 10 miles, you’ll reach Upper Paradise Valley: a welcome end to the first day. Set up camp, and enjoy a well-deserved foot soak in the river as evening falls. Metal bear lockers are available here.
Rae Lakes Loop Day #2: Upper Paradise Valley to Middle Rae Lake (12.7 miles; 3,800′ elevation gain)
Day #2 is arguably the toughest day on the trail, with both the longest mileage and most elevation gain. However, you’ll also be rewarded with some of the most awe-inspiring panoramas in the High Sierra.
To start your day, look for a rudimentary bridge at Upper Paradise Valley to cross the creek (or, wade through the usually 2-3″ of water) and pick up the trail on the far side.
You’ll immediately start climbing through lush fern and pine forests. At times the undergrowth will give way to more exposed pockets, before plunging back into the ferns again. But the elevation gain is constant.
Again, remember to keep looking back at the breathtaking vistas behind you, with sharp granite peaks rising above the river below.
Castle Domes Meadow is a highlight through this portion of the trail, where the sharp green of the meadow contrasts with the towering Castle Domes peaks behind.
At 6.6 miles, you’ll reach Woods Creek Bridge, a suspension bridge that also marks where the trail meets up with the JMT and PCT. At this point, you’re over halfway done with the day!
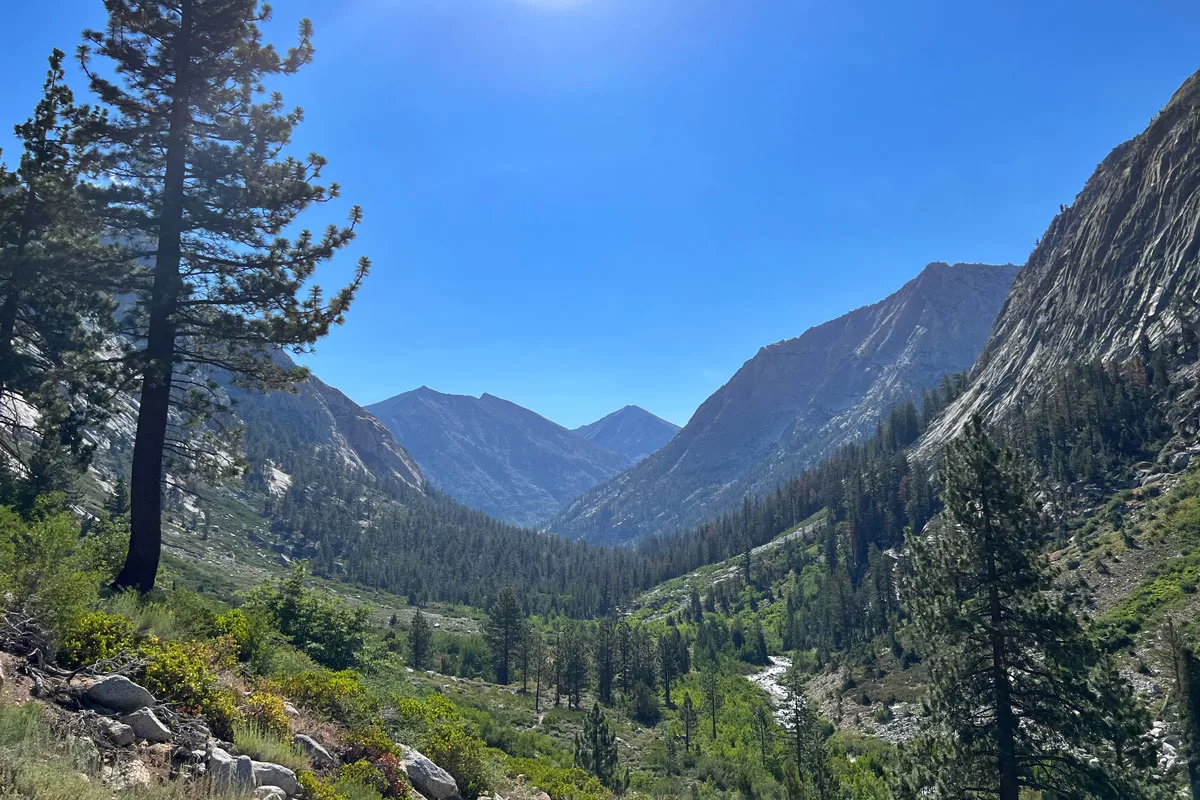
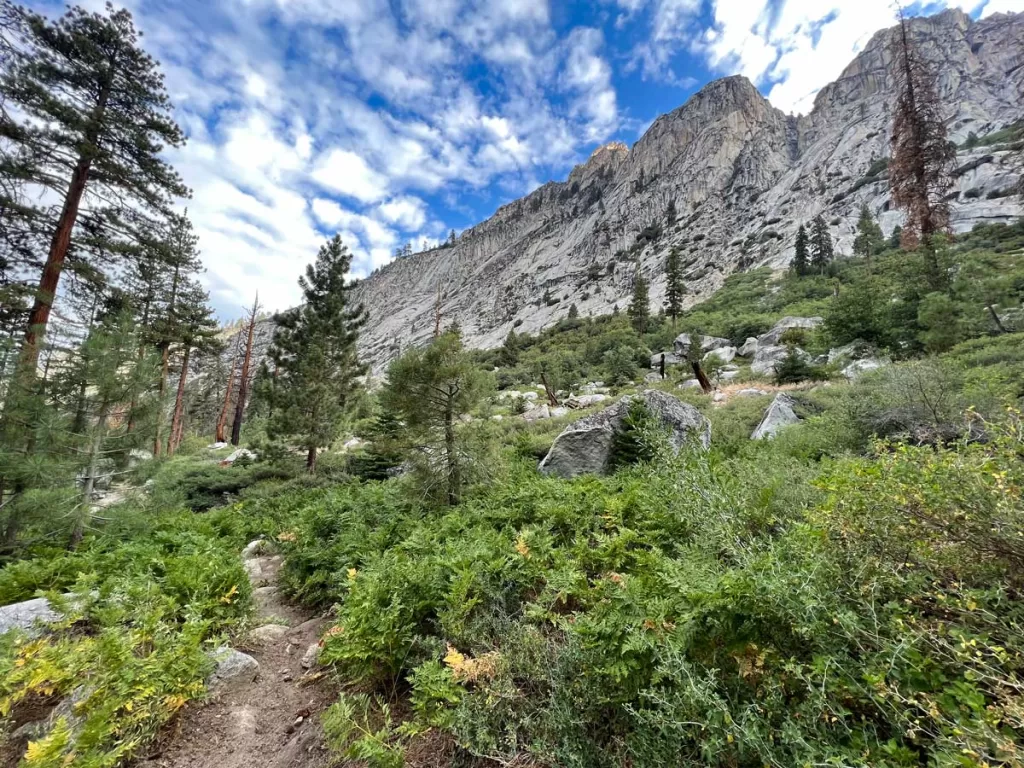
Over the next 2.5 – 3 miles, you’ll leave the forest for the true High Sierra as you surpass 9,000′ elevation. Shorter, scrappy trees do little to provide shade, and the landscape is unforgiving above the tree line: stark plains, with dramatic peaks as far as the eye can see.
The trail here is endless exposed vertical — not always steep, but always up, up, up.
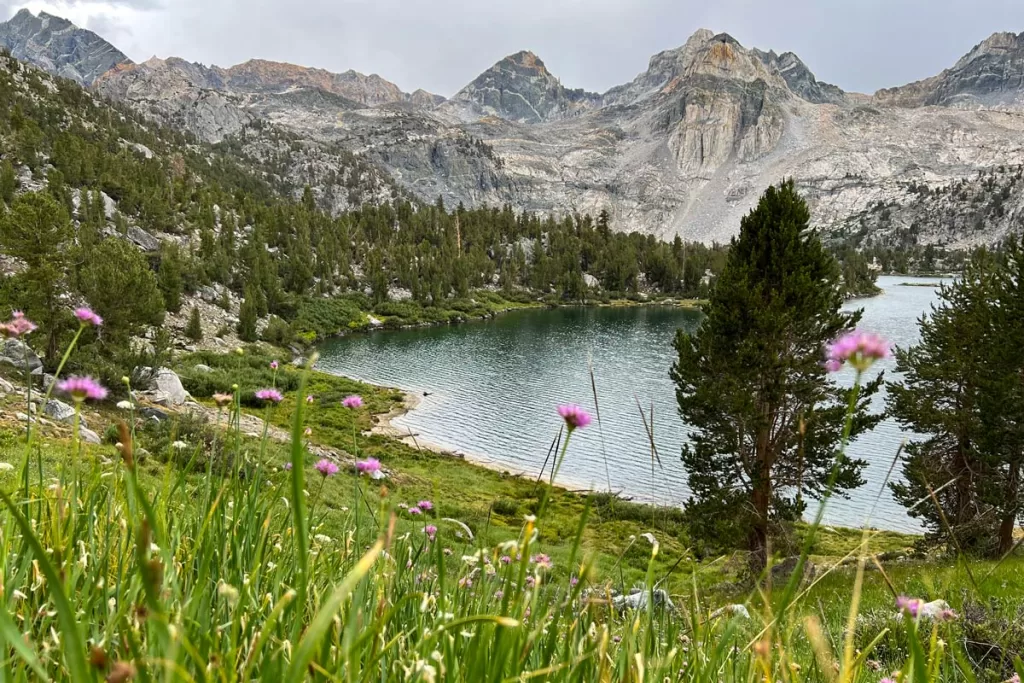
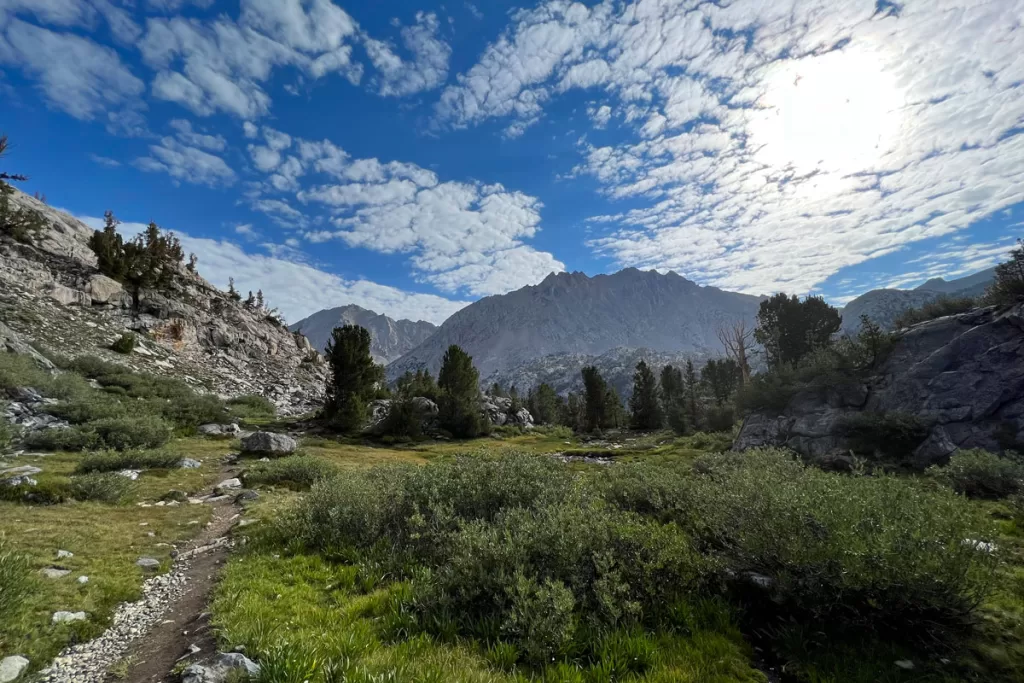
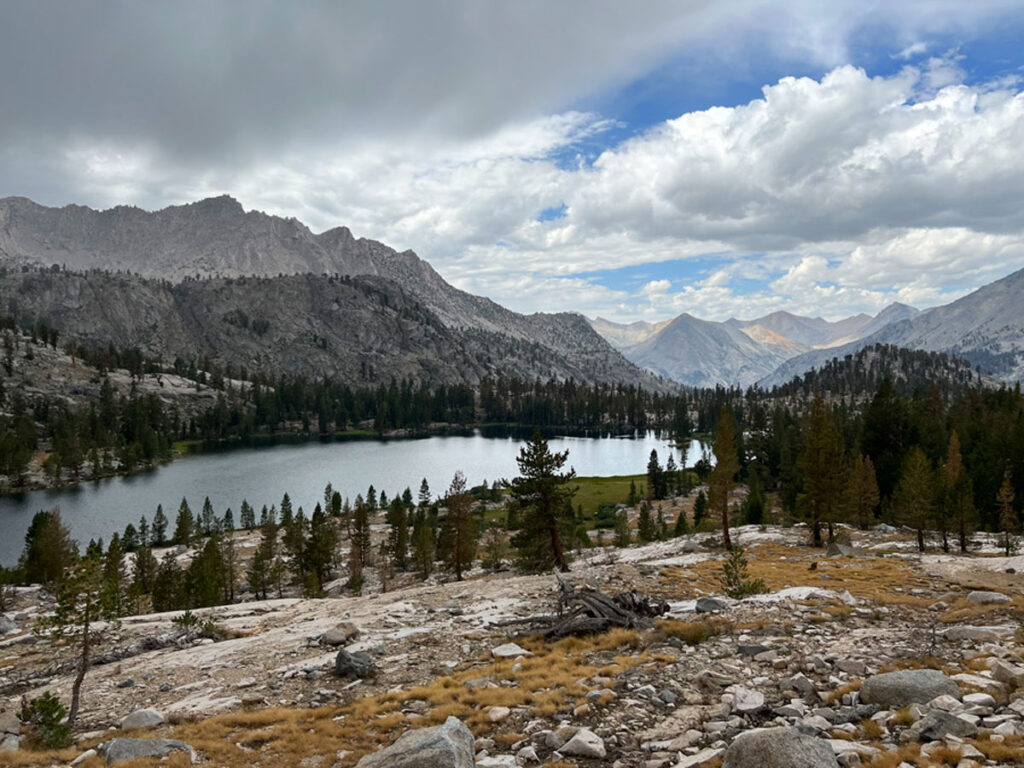
At approximately 9 miles, you’ll come to Dollar Lake — a welcome sign that the worst is behind you. Take a breather on its shaded banks, before continuing the last few miles to Rae Lakes.
This final stretch winds through gorgeous high country meadows, with bright summer wildflowers and babbling brooks.
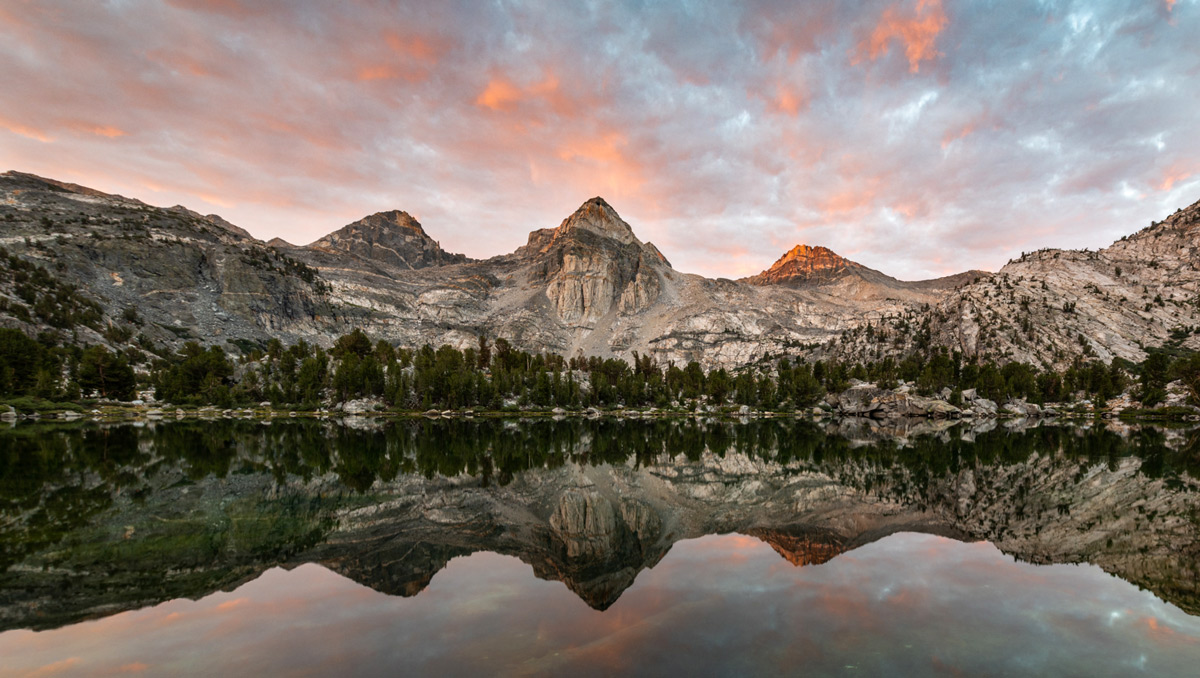
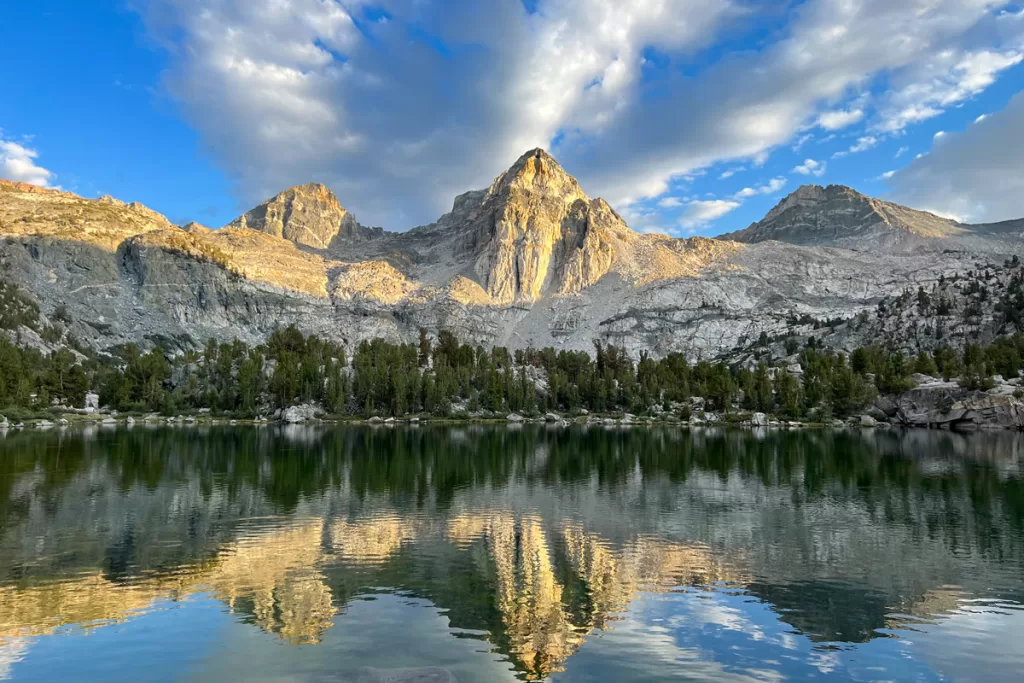
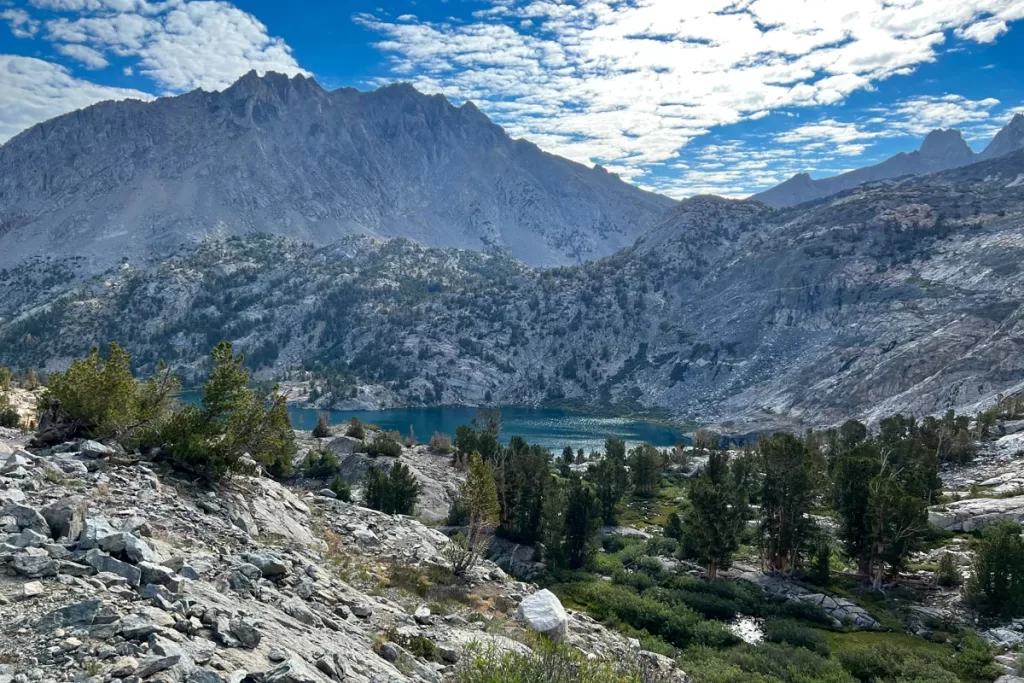
Climbing the last 300′ of elevation, you’ll reach the ridge above the three Rae Lakes, as the famous Fin Dome comes into view.
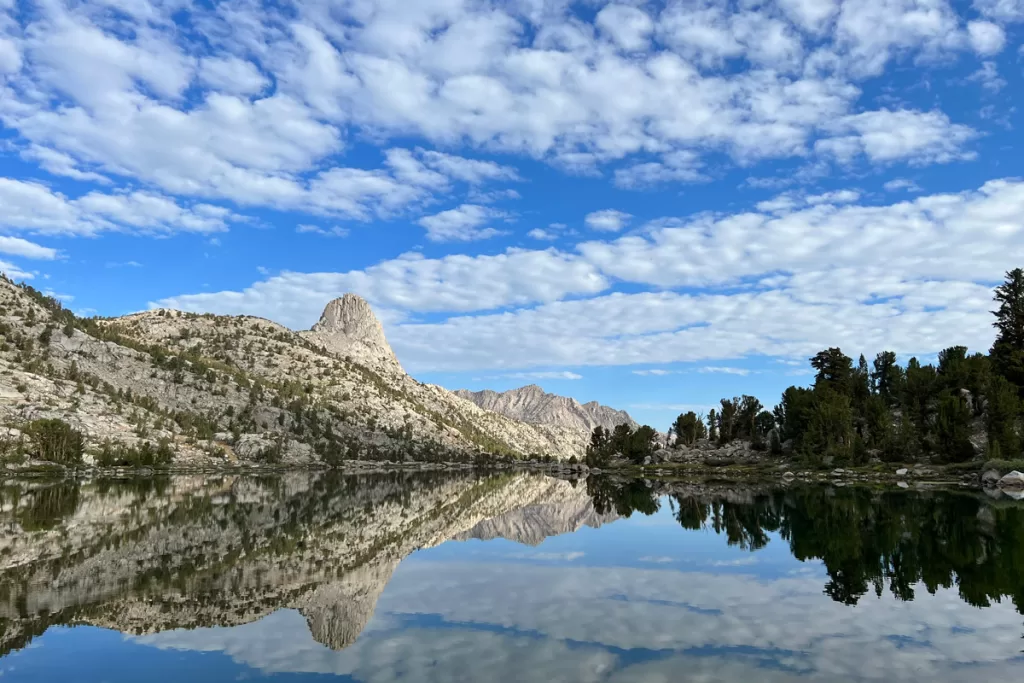
While it’s tempting to stop at Lower Rae, tomorrow you’ll appreciate having pushed on another mile to Middle Rae, when it’s less distance up and over Glen Pass.
During peak season, park rangers staff a primitive ranger station above the trail between Lower and Middle Rae.
And while there are scattered bear lockers around the lakes, campsites are so dispersed that they’re hard to find. Expect to rely on your personal bear canister here.
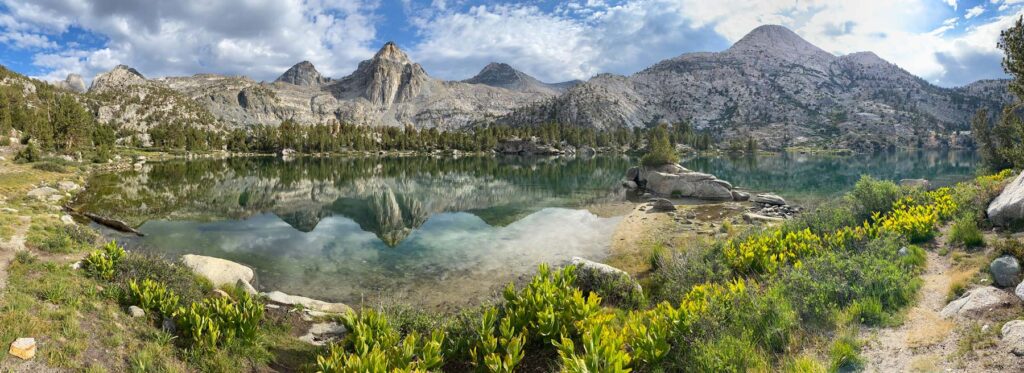
Find a secluded spot along the banks and set up camp, where you can celebrate a well-deserved rest in some of the purest, most spectacular alpine scenery imaginable.
It’s kind of cool to think that at this point, you’re 20 miles from the nearest road. Anyone you see had to get here the same way you did — on foot!
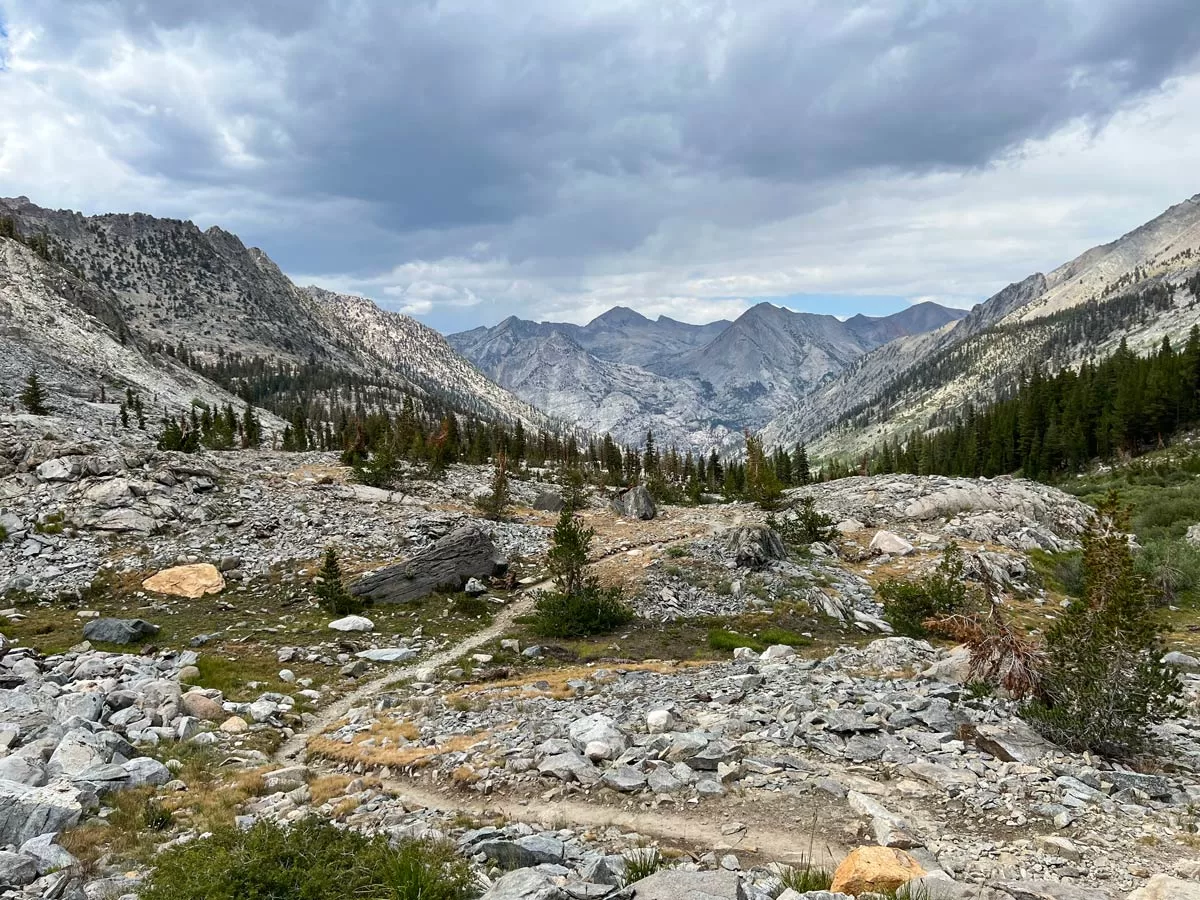
Rae Lakes Loop Day #3: Middle Rae Lake to Junction Meadow (8.4 miles; 1,400′ elevation gain then 3,800′ elevation loss)
Today’s the big day: summiting Glen Pass. Don’t be intimidated, though. You already finished the hardest part of the trail, and Glen Pass peaks early, just 2 miles into the trail.
After breaking camp and setting off, the path will wind along Upper Rae Lake before immediately starting the 1,500′ ascent.
Make sure to stock up on water, as this will be the longest stretch without access. Your next water source is approximately 6 miles down the road, on the other side of Glen Pass.
Take your time, and settle in to a slow but steady pace up the switchbacks. It will go by faster than you think!
At 11,000′ you’ll rise above all vegetation, with nothing but the silent expanse of shale, along with a few icy blue lakes dotting the barren moon-like landscape.
The summit of Glen Pass logs in at 11,998′, with a narrow “tightrope” along the ridge line (about 200 feet long and 15 feet wide) before dropping down the backside of the mountain.
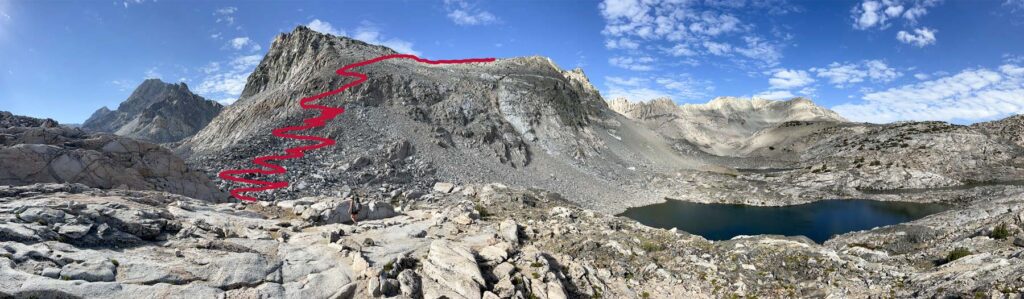
Stop and savor the view of what you’ve accomplished, with peaks as far as the eye can see. Once you’re ready to move on, it’s all downhill from here for the rest of your trip!
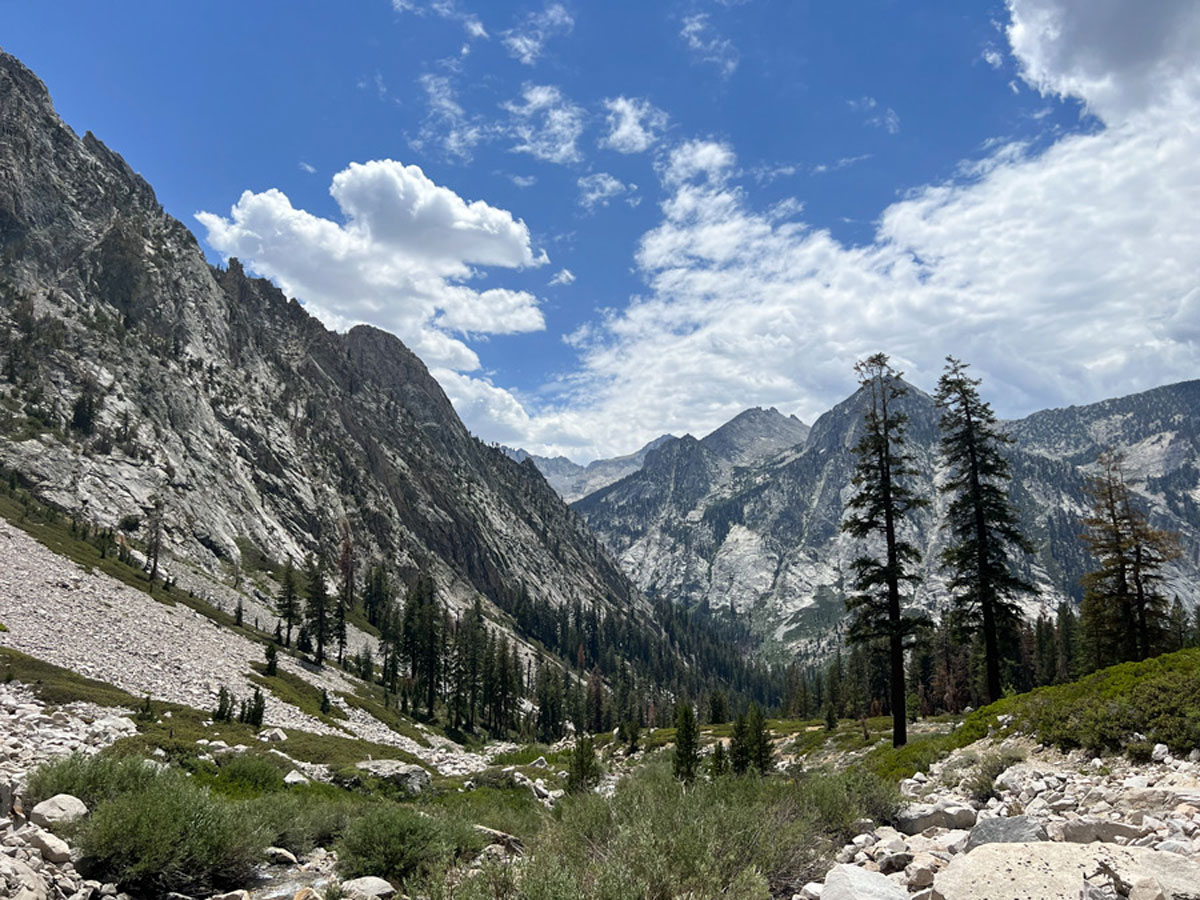
The next few miles will pass along exposed ridges of scattered, hardy trees with granite “stairs” taking you down in elevation.
Bullfrog Lake, just before the Charlotte Lake junction, brings you back to regular water sources, with more of the stunning scenery you’ve no doubt become accustomed to by now. You’ll hook up with Bubbs Creek and follow it down lush hillsides for the remainder of the day.
to East Vidette Mountain.
Vidette Meadow is an idyllic spot to stop for lunch and rest weary feet. From here, it’s just 2.2 miles to Junction Meadow (your camp for the third and final night of the Loop).
Once you arrive at Junction Meadow, find an agreeable spot and set up camp for the night. As with the Rae Lakes, the bear lockers here aren’t always obvious, so don’t rely on using them.
Tip: if you pass the main Junction Meadow and continue on another ½ — ¾ mile, you’ll find some prime, unspoiled spots on the banks overlooking the rushing Bubbs Creek.
Rae Lakes Loop Day #4: Junction Meadow to Trailhead (10.3 miles; 3,800′ elevation loss)
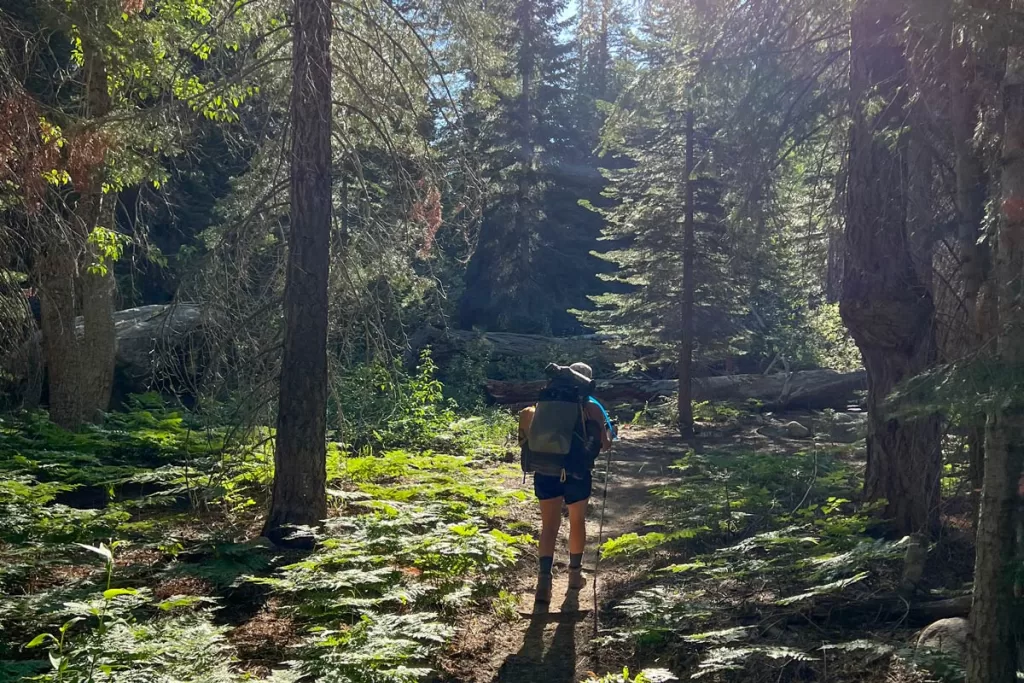
The home stretch! With the car tantalizingly close and a more monotonous landscape today (you’ll traverse the same fern forests you experienced on day #1), most hikers set an ambitious pace towards the trailhead and the inevitable burger awaiting you at Cedar Grove.
The first few miles traverse along a soft, mostly level forested path. The trail never strays far from Bubbs Creek, before it eventually opens up to thick grasses and steeper descents.
In the summer months the mosquitoes and gnats can be terrible through here. Bring a head net, for your sanity.
There’s not as much to note along the trail today: it’s a constant descent, but without the awe-inspiring landscape of prior days. Which, helpfully, keeps you moving homewards without the desire to continuously stop for photos.
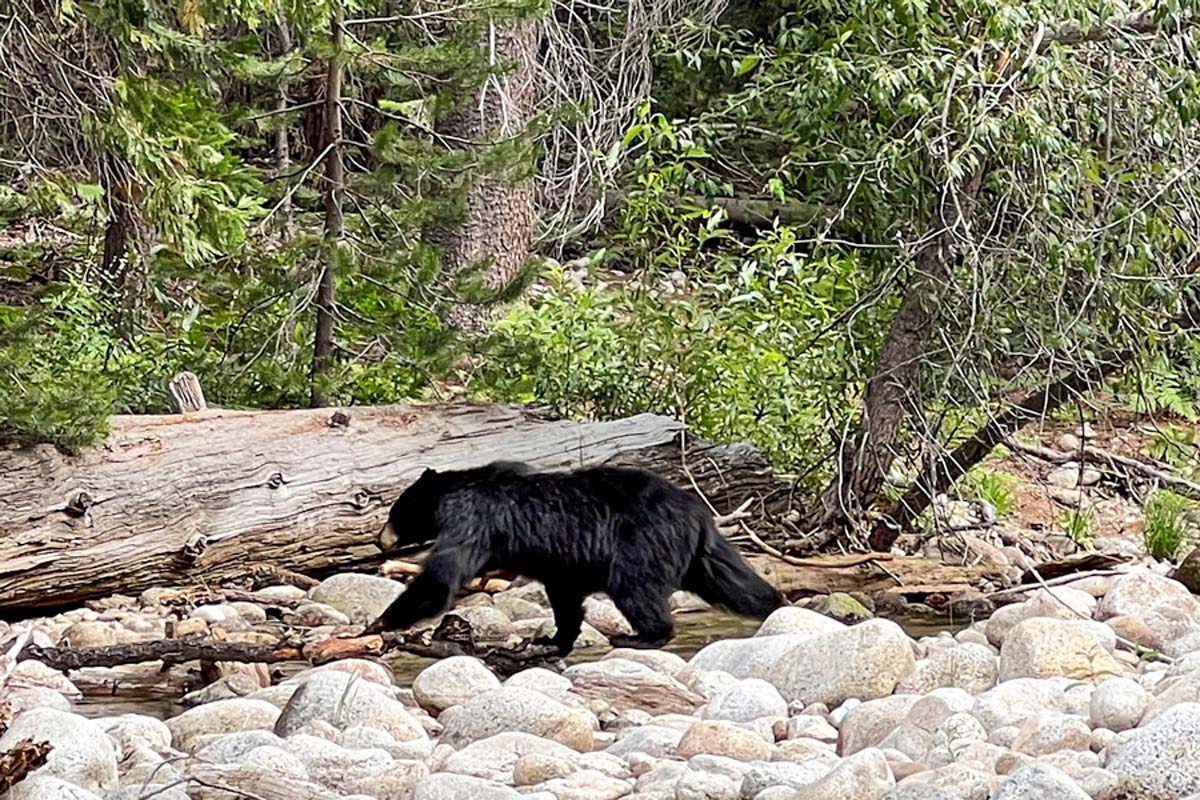
This stretch is popular with the local bears, so remember to make lots of noise as you pass through, to avoid startling them.
At the Woods Creek bridge, you have just 4 miles left to the trailhead. Past this point, you’ll hit the day’s only set of switchbacks, with approximately 1 mile of loops down towards the valley floor.
At the bottom of the switchbacks, you’ll once again reach shaded forest before arriving at the Bailey Bridge, which signifies the “official” start of the trail.
If you aren’t too eager to reach the car, you may enjoy cooling off in Bubbs Creek here, before making the final push through the same 2 miles of sandy trail that you started on, four days and 40 miles ago.
Slogging along the soft sand here is arguably the most painful (mentally, if not physically) part of the journey. It’s the last hurdle for your aching legs, before the trail parking lot comes into sight and you triumphantly hobble across the finish line.
Don’t forget to snap a photo by the Rae Lakes Loop sign on your way to the car!
Personally, we enjoy stopping for lunch at Cedar Grove Grill, 15 minutes down the road, to celebrate completing the Loop.
The on-site restaurant serves comfort food fare – nothing special, but a burger has never tasted so satisfying as after 40 miles and four days of backpacking meals.
Grab some drinks and grub, and go sit down by the river to gorge on the well-deserved calories.
Rae Lakes Loop Wildlife and Safety
Bears
California black bears are plentiful along the Rae Lakes Loop, and are very used to sharing their habitat with humans hiking in the area.
Black bears are naturally skittish and much less aggressive than their grizzly cousins, but will still brazenly try to access a food source. As summed up by a Kings Canyon park ranger, “they’re basically giant raccoons.”
Bears are especially present in the fern forests between the trailhead and Upper Paradise Valley (day #1) and Junction Meadow (day #4). Be sure to make your presence known as you traverse these areas: talk loudly and make noise. If the bears hear you coming, they’ll stay out of your way.
While camping at night, ensure that there is nothing scented in your tent (including the lip balm you forgot was in your pocket).
Remember to stash your bear canister 100+ yards away. Wedge it tightly between rocks, logs, or otherwise make it challenging for bears to access. Never store your canister near a cliff or running stream, as bears could knock it off the hill or down the river.
Rattlesnakes
Rattlesnakes also reside along the loop, and there is a chance you may see one sunning itself on the trail.
Stomping your feet will notify snakes of your approach, as they can feel the vibrations.
Always keep an eye on the trail ahead of your feet, and be careful stepping down off the backside of rocks. If you see a snake, don’t make any sudden movements. Back up slowly, and give it a wide berth as you go around it.
Inclement Weather and Fire Safety
As with any trip into nature, always check the weather forecast before you depart, and talk with a ranger for further info.
Wildfires can also be common in the Sierra during the summer months (usually picking up in August). Familiarize yourself with current blazes at the interactive Cal Fire Incident Map.
Always bring a GPS when going into the backcountry. These handy devices help expedite search and rescue should you get injured, lost, or otherwise trapped.
We personally like the Garmin inReach Mini. It’s tiny, has an SOS button to alert rescuers of your location, and even lets friends and family back home watch your progress. It’s pricey – typically running $400. However, you can sometimes find Amazon resellers posting it in the $250 range, along with many other cheaper options.
Arriving in Sequoia and Kings Canyon early, and looking for some easy hikes to acclimate to the elevation? Check out our guides for the best easy hikes and moderate hikes in Sequoia National Park. They’re just enough to open the lungs and stretch the legs, without tiring you out before your epic Rae Lakes adventure.
2 comments
So glad you found it helpful! It’s hard to truly capture the beauty of this hike in words. Hope you make it on the trail soon… you won’t regret it 🙂
Greetings! Very helpful advice in this particular article! Its the little changes that produce the largest changes. Thanks a lot for sharing!