The High Sierra Trail is arguably the second most famous backpacking route in the Sierra Nevada, after the John Muir Trail. Beginning in Sequoia National Park’s Crescent Meadow, it transverses the Great Western Divide before ending at Mount Whitney, the highest peak in the continental U.S.
The full trail is 72 miles and requires staging two cars (one at the start, and one at the finish). However, this shorter “out and back” trip from Crescent Meadow is a great alternative to the full distance.
At 34 miles roundtrip, this itinerary is extremely popular with backpackers preferring a 3-day overview of the High Sierra Trail. You’ll still get full immersion in wild, untouched backcountry, with no shortage of incredible scenery. But logistics are greatly simplified by returning the way you came, without needing to stage a car or carry extra days’ worth of food.
Along the way, you’ll play witness to epic, jaw-dropping vistas. The High Sierra Trail is pristine wilderness, with rugged peaks, crystal clear alpine lakes, and dazzling panoramas everywhere you turn.
High Sierra Trail: Crescent Meadow to Hamilton Lake
Distance: 17 miles one way
Recommended Time: 3 days, 2 nights (if returning the way you came, for 34 miles roundtrip)
Elevation: 8,250’ gain and 4,400’ loss
Permit Required: Yes, during quota season (May 22 - Sept. 26, 2026)
Jump to:
- Overview
- Permits
- What to Pack
- Where to Stay the Night Before
- Water Crossings
- Location and Trailhead
- Day #1: Crescent Meadow to Bearpaw Meadow
- Day #2: Bearpaw Meadow to Hamilton Lake
- Day #3: Hamilton Lake back to Crescent Meadow
- Wildlife and Safety
High Sierra Trail Overview
This itinerary details the High Sierra Trail from the trailhead at Crescent Meadow to Hamilton Lake, 17 miles in. From there, you can opt to return the way you came (34 miles roundtrip) or continue on towards Mount Whitney (72 miles, point-to-point).
Elevation gain: The trail undulates the whole way, so be prepared to gain and lose elevation the entire trek. However, decent stretches of flat will help you catch your breath between climbs.
Fitness: To complete this hike, you should be in decent physical shape, but this trail is no more strenuous than any other overnight backpack in the Sierras.
Bear lockers: There are metal bear lockers at most designated campsites, but you shouldn’t rely on them. It’s required to carry your own portable bear canister.
Insects: Mosquitoes are prolific in the forested areas of the High Sierra Trail, especially near meadows. Plan to bring insect repellent and bug nets, if you have them.
High Sierra Trail Permits
Permits are required during quota season (in 2026, quota season runs from May 22 – Sept. 26).
How to Reserve a High Sierra Trail Permit
There are different regulations for hiking during quota season vs. off-season.
- Quota Season (May 22 – Sept. 26, 2026): Permits go online at 7 a.m. Pacific time each day, six months from the start date. They typically sell out immediately, due to high demand. Plan to be online with a few minutes to spare, exactly six months from your expected start date. The morning your reservation window opens, go to recreation.gov’s Sequoia and Kings Canyon National Park Wilderness Permits page. Select “Explore Available Permits” and scroll down to choose “High Sierra Trail” from the list below.
- Outside Quota Season (Sept. 28, 2025 – May 21, 2026 and Sept. 27, 2026 – May 20, 2027): Permits during off-peak season are free, self-issued, and not limited to daily quotas. Simply pick up a permit at one of the park visitor centers when you arrive.
Safety Outside of Quota Season: if you’re planning to hike outside quota season, pay extremely close attention to the weather forecast. With high elevation and challenging backcountry terrain, weather conditions are frequently dangerous outside the summer months. Always check with a ranger before starting your trip.
Didn’t Get a Permit?
If you didn’t get a permit during your preferred dates, keep checking back! People often release permits, which are then reposted at the same page as they become available. In the past, we’ve had luck snagging re-released permits even a few weeks out from our travel dates.
You can also obtain walk-up permits at Sequoia’s Lodgepole Visitor Center, starting at 1 p.m. the day before. However, trying for a walk-up permit is not recommended. The High Sierra Trail is in high demand, and it’s a long drive if you come away empty-handed.
Picking Up Your Permit
Pick up your permit at the Lodgepole Visitor Center in Sequoia National Park (directions), either the afternoon before or morning of your hike. You’ll go through a brief safety talk with the park ranger, before signing out your permit and hitting the trail.
The ranger will also give you an overnight parking permit to leave on your vehicle dashboard at the Crescent Meadow parking lot. Your car must have the permit clearly displayed while you’re out on the trail.
What to Pack for the High Sierra Trail
Temperatures: As with any backpacking trip in the Sierra, plan for large temperature swings. During peak summer hiking season, the trail can often hit high 80s – low 90 degrees Fahrenheit during the day, while cooling off enough to require warm layers in the early morning and late evening.
Insects: Mosquitoes are very plentiful in the wooded areas around Bearpaw Meadow. If camping overnight in this area, prepare to cover exposed skin and bring insect repellent. Head nets are a great bonus, as well.
Bear Boxes: while many of the trail’s designated camping sites have metal bear lockers, they can often be full and aren’t always easy to find. Plan to bring your own portable bear canister. If you don’t own one, you can rent from REI or similar stores.
Water Sources: Water is plentiful along the loop, but filtering is required. We like the LifeStraw gravity filter, but any quality water filter will do (the Katadyn gravity filter is a close second).
You can also check out our backpacking packing list guide, which includes a downloadable PDF packing checklist, along with tips, hacks, and other recommendations.
Where to Stay the Night Before
Hotels
The Wuksachi Lodge is the only hotel within Sequoia National Park, and high demand creates rates upwards of $250/night in the summer months.
Just outside the park, you can find more hotels in the town of Three Rivers or for better value, Visalia (a 60 to 90-minute drive away) has every hotel chain imaginable.
Camping
If convenience is more important than comfort the night before your hike, you can grab a campsite in one of Sequoia’s 15 campgrounds.
Lodgepole is the park’s preeminent campground and closest to the trailhead, but often fills up months in advance.
A little further out (approximately a 30-minute drive), we like Stony Creek for its serene setting and lesser-known name.
Water Crossings
There are seven water crossings between Crescent Meadow and Hamilton Lake: Mehrten Creek (mile 6), Seven Mile, Eight Mile, Nine Mile, Buck Creek (mile 10), Lone Pine Creek (mile 15) and Hamilton Creek (mile 16).
Buck Creek (mile 10) and Lone Pine Creek (mile 15) have bridges. The others all require scrambling or wading through the current, and can range from simple (Seven, Eight, Nine Mile) to somewhat sketchy (Mehrten Creek, Hamilton Creek).
Complexity of water crossing is dependent on the amount of snow melt from the previous winter, but water flow usually drops off significantly by August.
When picking up your permit at Lodgepole, be sure to ask the ranger for advice about water crossings. They can offer valuable insight into water levels and tips on best locations to cross.
High Sierra Trailhead
The trailhead is located at Crescent Meadow, where you can leave your vehicle in the large, paved parking lot (directions here).
The lot is shared with tourists visiting the meadow, but as long as you depart on the High Sierra Trail by early to mid-morning, you shouldn’t have trouble finding a parking spot.
Day #1: Crescent Meadow Trailhead to Bearpaw Meadow (11.4 miles, 3,850’ elevation gain and 2,650’ loss)
A Quick Note on Campsites
We strongly recommend going all the way to Bearpaw Meadow today. Tomorrow’s Hamilton Lake is so spectacular, you’ll want to maximize your time there, and will be glad you put the extra mileage behind you today.
But if you choose to shorten today’s distance, there are additional small campsites at Mehrten Creek (6 miles), Nine Mile Creek (9 miles) and Buck Creek (10 miles).
Once you’re ready to hit the trail, find the High Sierra Trail marker at the edge of the Crescent Meadow parking lot and take a right along the meadow loop.
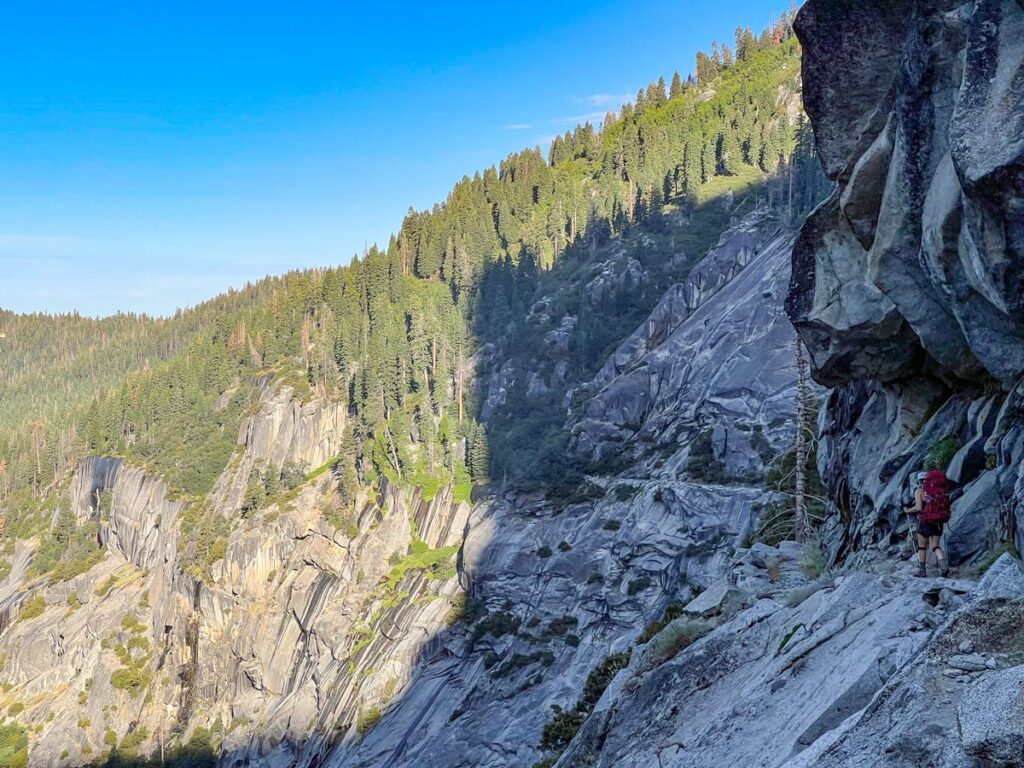
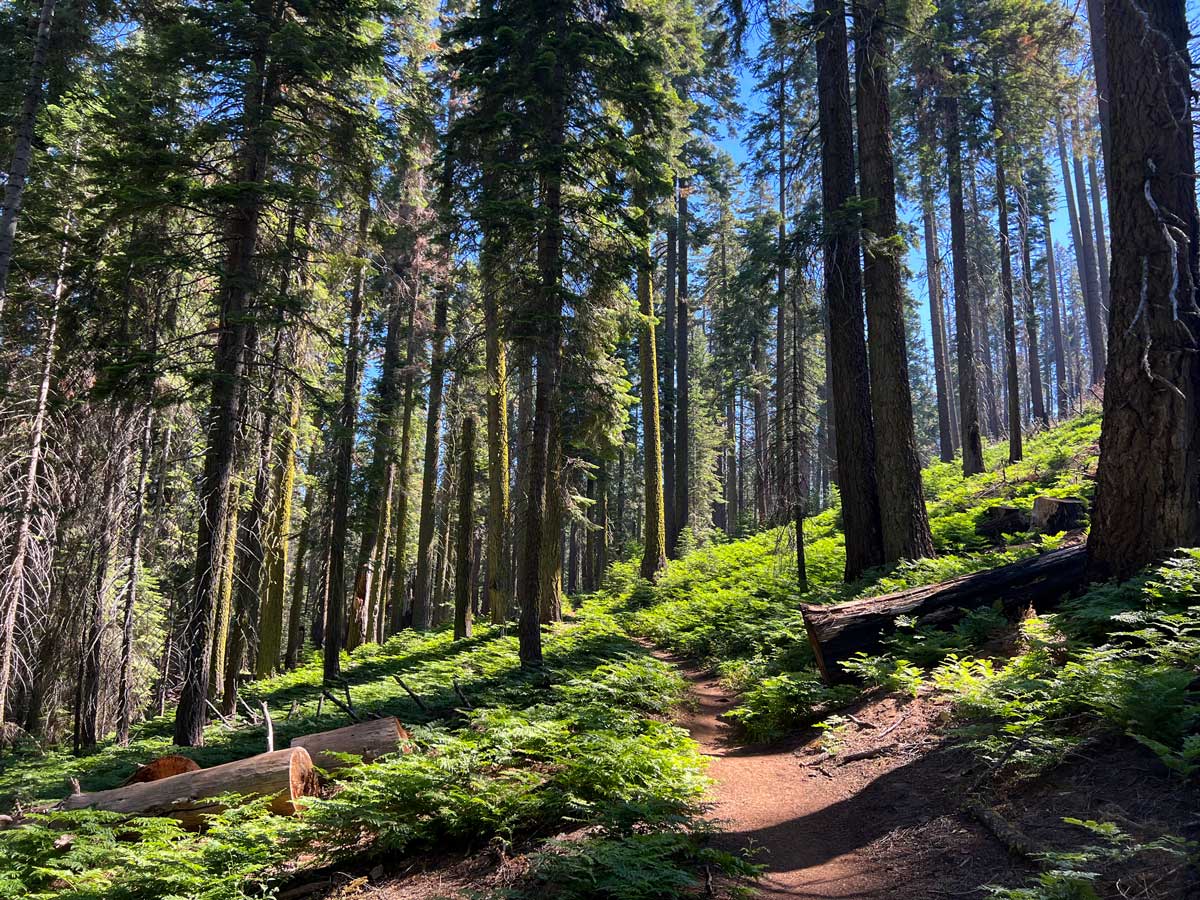
The first mile gradually climbs through cool conifer forests over soft footing, as you hug the perimeter of Crescent Meadow.
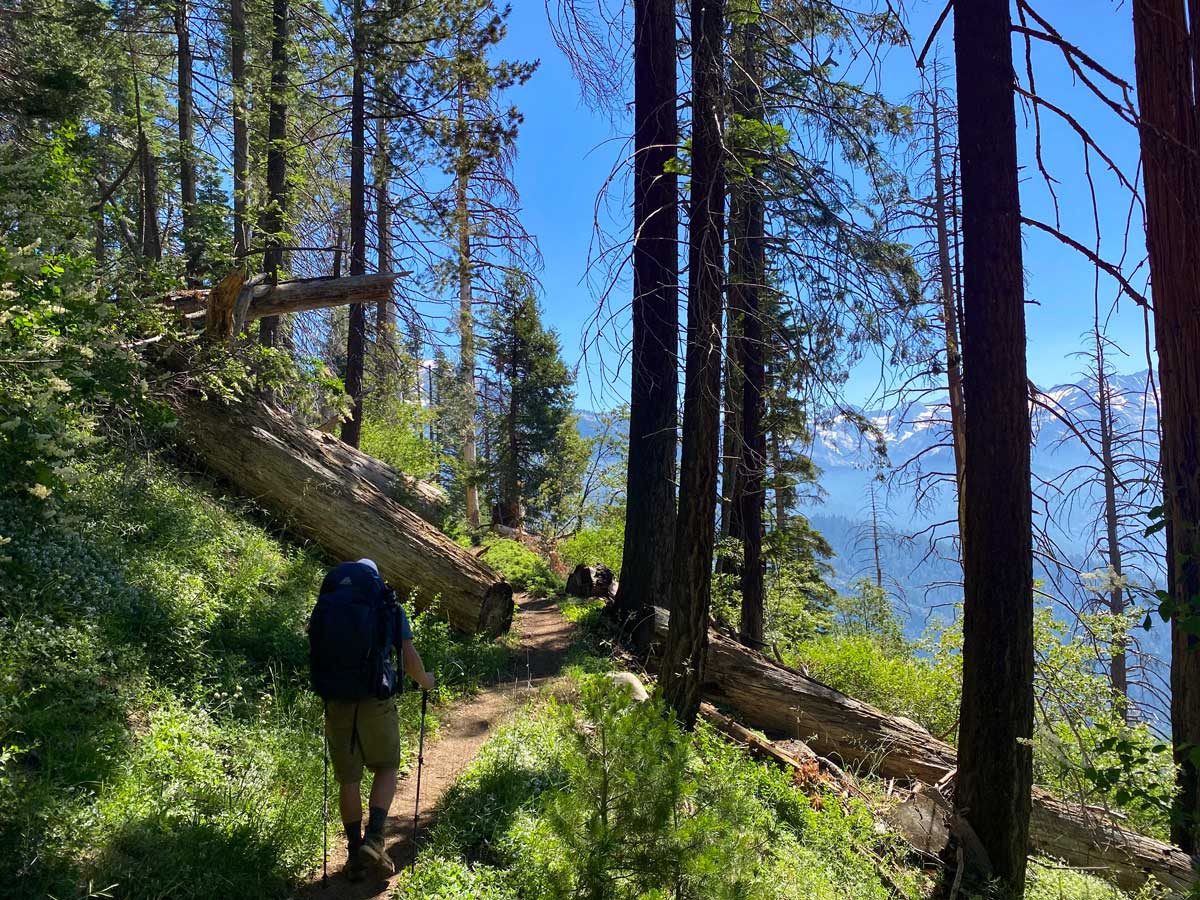
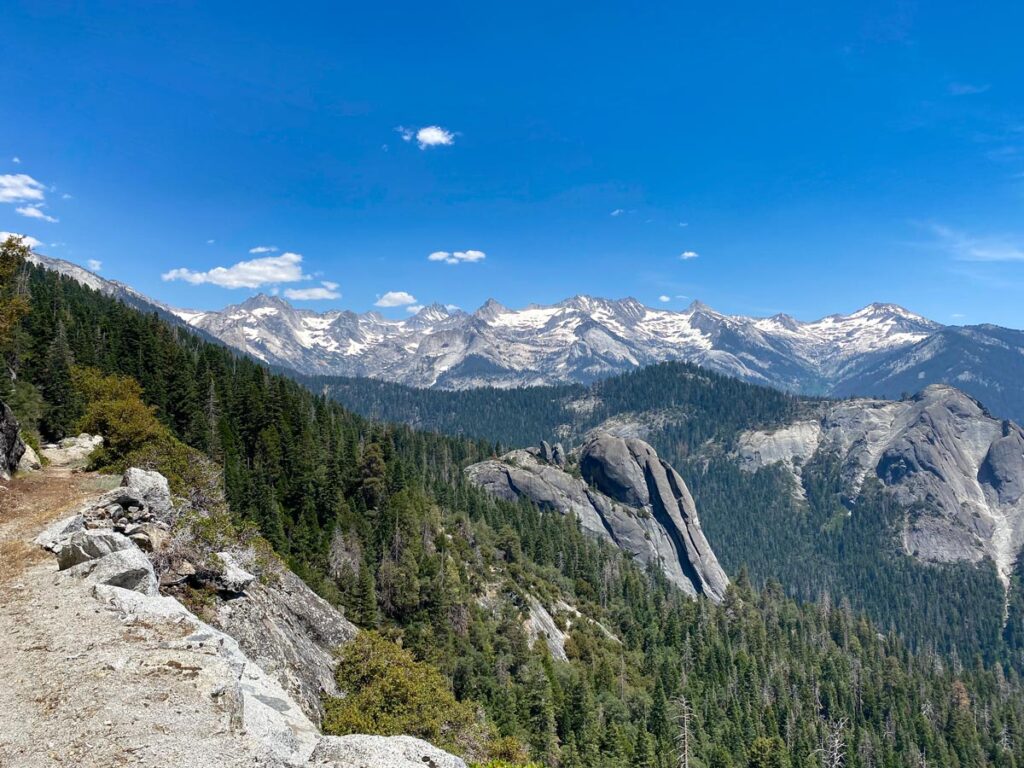
Upon reaching Eagle View (approximately 1.5 miles in), the terrain opens up to the granite cliff edge that you’ll follow for most of the day, looking down to Kaweah Canyon. However, the trail isn’t horribly exposed, and you’ll continue to alternate between shaded forest and short exposed bits.
You’ll think the views are already epic, but just wait until you get further along into the backcountry!
The trail will continue to rise and fall, undulating without too dramatic of elevation change for the first 8 – 9 miles. You’ll have a few steep stretches down the road, but more on that later…
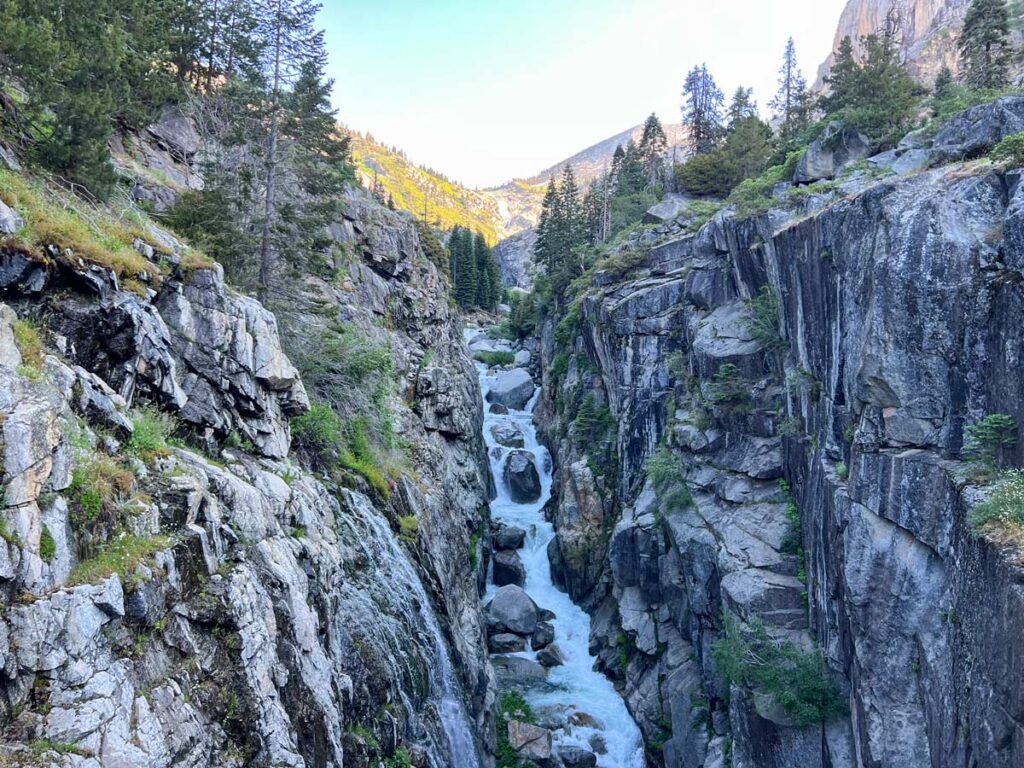
You’ll hit Mehrten Creek first (approximately 6 miles in), the biggest water crossing you’ll have today.
The creek often runs a strong current through July, appearing more like a roaring stream down and over a steep waterfall, and requires careful navigation.
Look for a large fallen log about 75 feet upstream. You can use it to cross to the small “island” in the middle of the creek. From there, it’s an easier skip to the far side.
Mileage-wise, Mehrten sits at about the halfway point today. With the shaded “island” including built-in rock and log seats, it’s a good place to stop for lunch.
Past Mehrten Creek, the views of the Great Western Divide become absolutely spectacular. You’ll keep stopping for photos, only to find a better view around each bend.
This part of the trail is exposed cliff face, with the sun beating down on the granite. It gets very hot in the summer, so try to pass through as early in the day as you can.
More water crossings greet you at the aptly named Seven Mile, Eight Mile, and Nine Mile creeks, but are very manageable after getting past Mehrten.
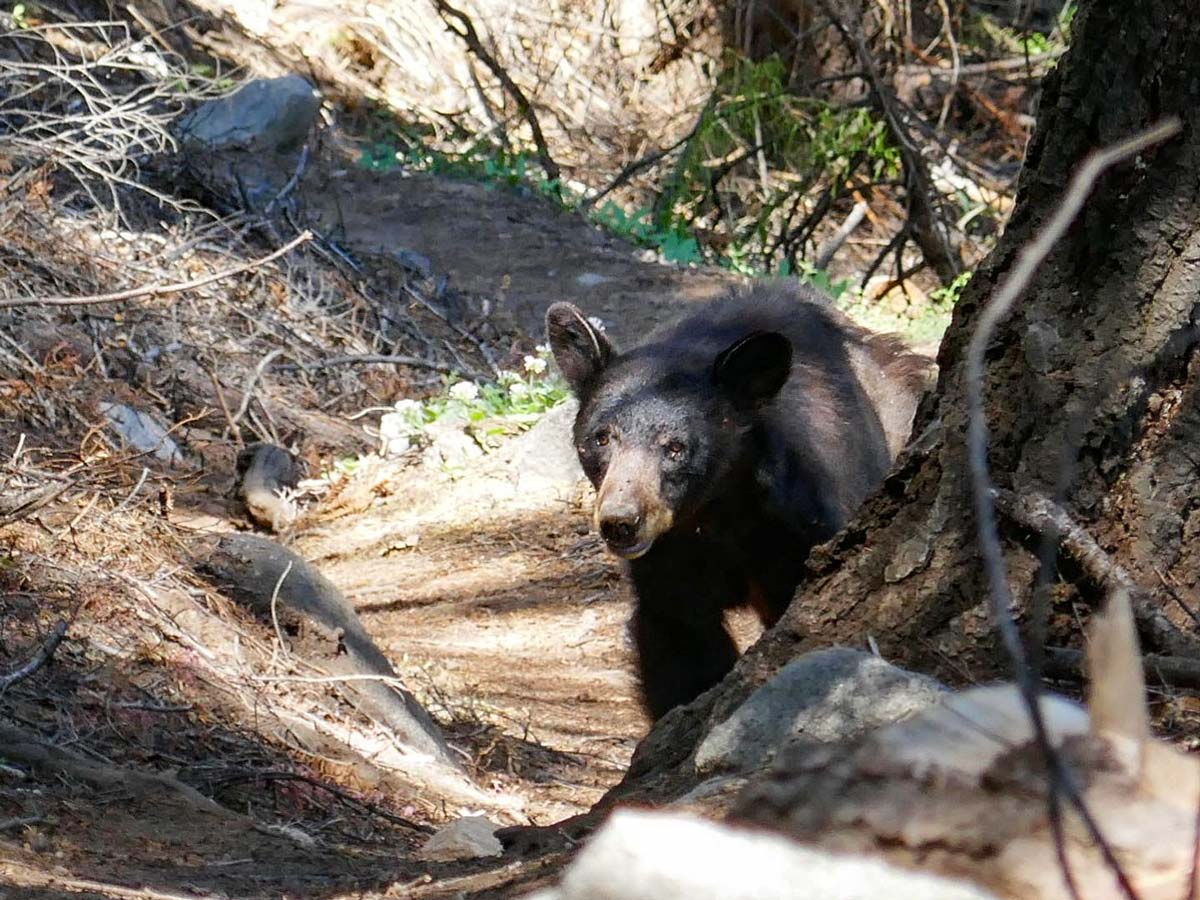
You’ll continue to have decent amounts of shaded forest trail along this stretch, which is a welcome respite in the afternoon heat (it’s popular with more than just human hikers; we passed a bear between Eight Mile and Nine Mile).
Once you cross Nine Mile Creek, you’ll have 1 mile of steeper descent along hot, exposed rock before arriving at the rushing Buck Creek. The good news is that Buck Creek is a bridge crossing; the bad news is that the steepest incline of the day is on just the other side.
After crossing Buck Creek, you’ll immediately launch into the final big ascent of the day: exposed switchbacks climb out of the canyon, for about 700’ elevation gain in 1 mile.
The trail soon enters dappled fern forests, but with aching feet on a continued ascent, you probably won’t appreciate the beauty like you would otherwise.
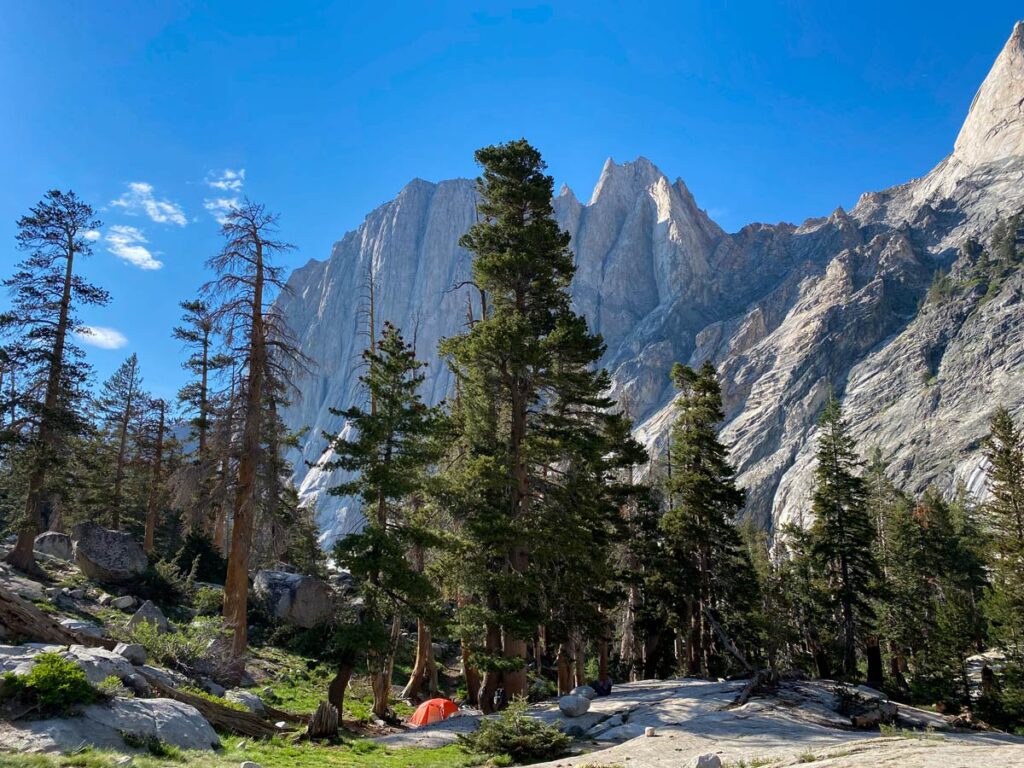
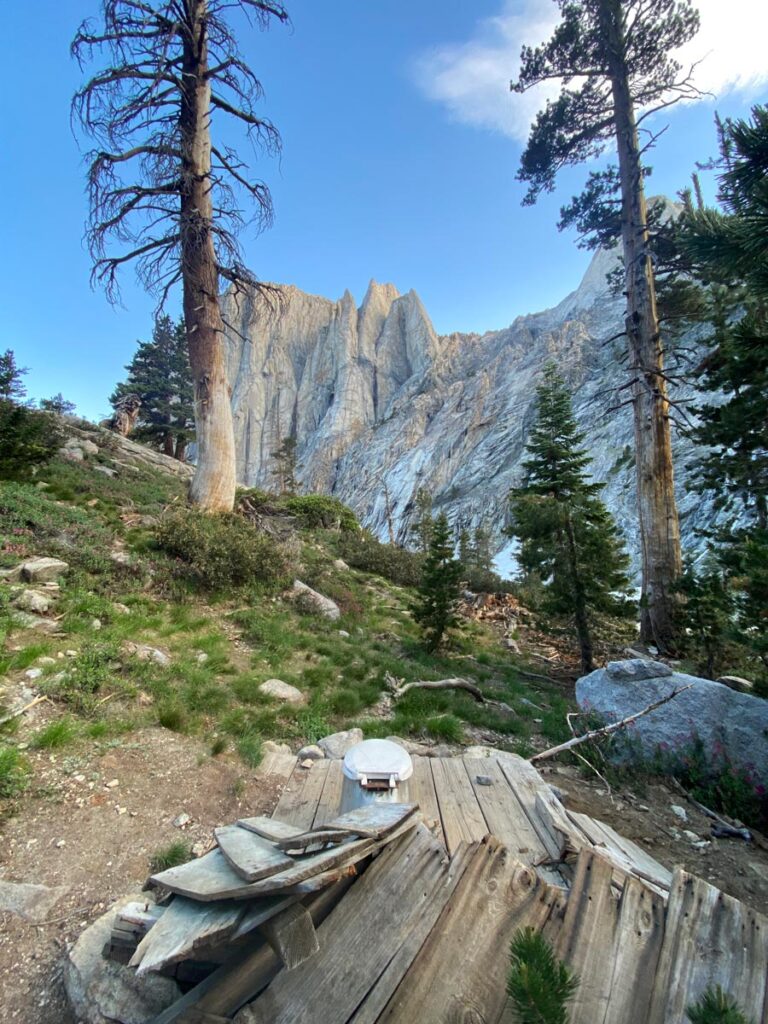
Once you crest the hill and the terrain levels out, you’re on the homestretch to Bearpaw Meadow. At the fork, follow the signs down the hill to the right if you’re planning to camp here tonight. There are a couple metal bear boxes in the open meadow, and soft flat ground to pitch a tent.
If you plan to keep going past Bearpaw, continue straight at the fork to the High Sierra camp, less than 100 yards ahead.
The camp was damaged in recent winter storms, and hasn’t yet been rebuilt. However, the ranger cabin is staffed full-time from June to September.
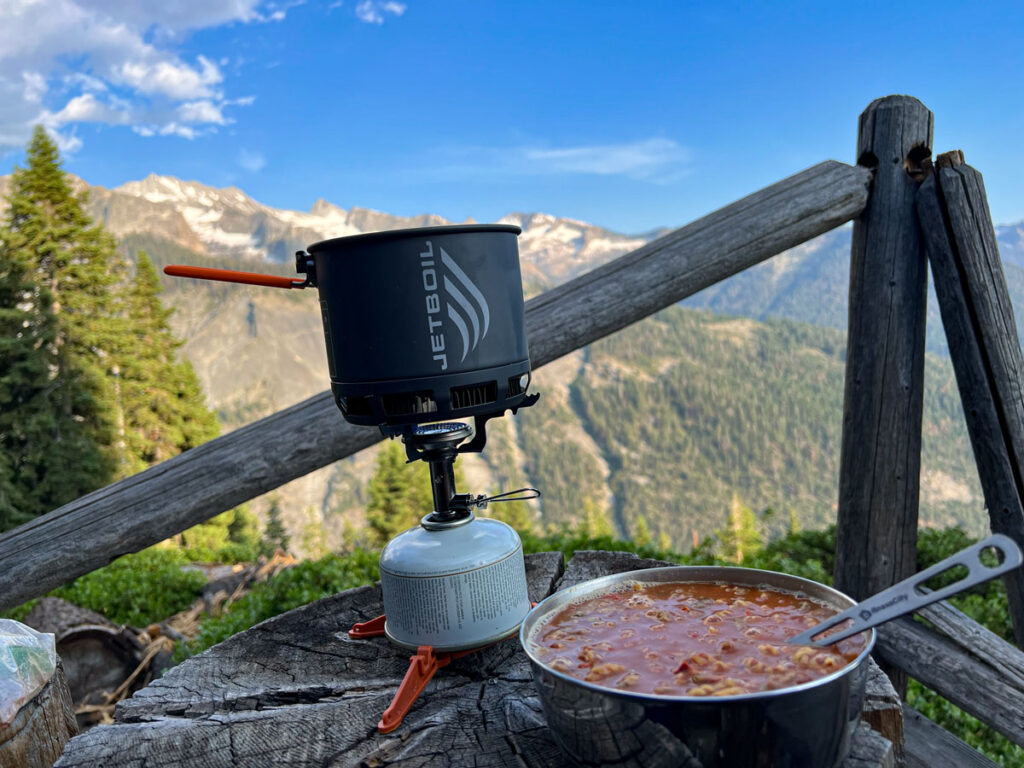
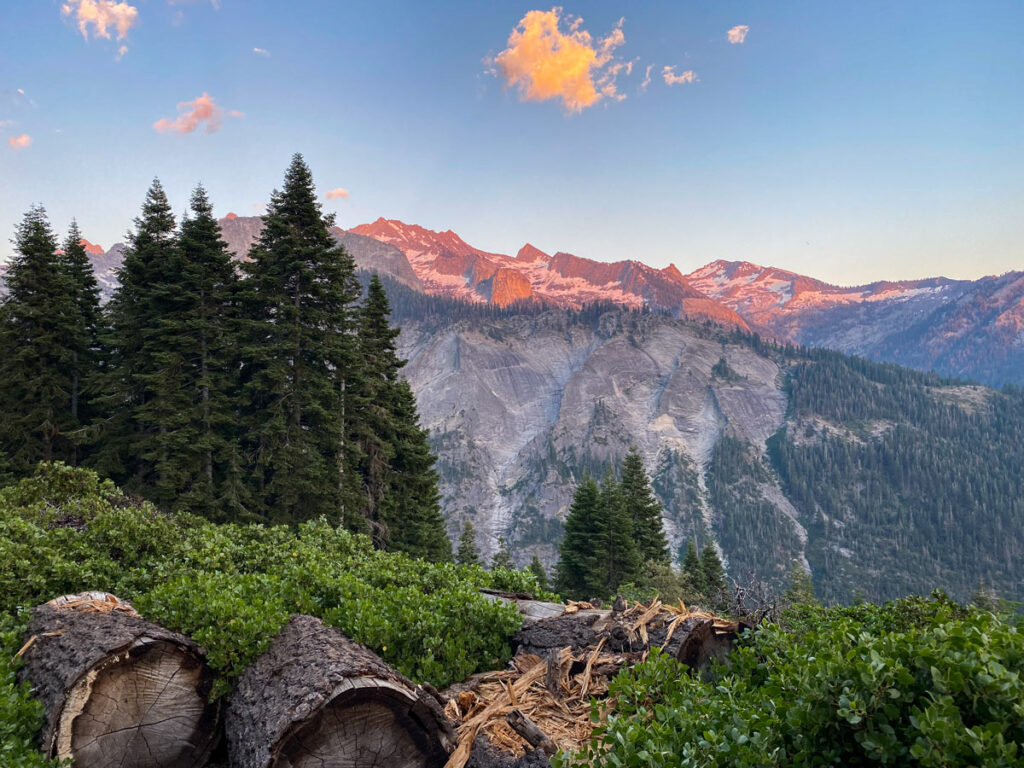
Once you’ve set up for the evening, take your dinner over to the raised wooden platforms that remain of the High Sierra camp. They’re perfectly situated to watch sunset’s rosy alpenglow wash across the faces of the distant peaks, as you savor a well-deserved meal to close your first day on the trail!
Note on Insects: the mosquitoes near the Bearpaw Meadow campground can be horrendous in the summer. They ease up dramatically over at the High Sierra camp 100 yards away, which is another good reason to spend your evening there.
Day #2: Bearpaw Meadow to Hamilton Lake (5.6 miles, 2,130’ elevation gain and 1,750’ loss)
Hamilton Lake is such an incredible gem of the High Sierra, yesterday’s long push to Bearpaw makes today worth it. With shorter mileage ahead, you’ll arrive at Hamilton Lake before lunch, leaving all afternoon to laze on its banks, in the shadow of simply dazzling alpine scenery.
This morning, make sure to refill your water stores before departing. There aren’t many viable water sources until you reach Hamilton Creek, so it’s a good time to replenish.
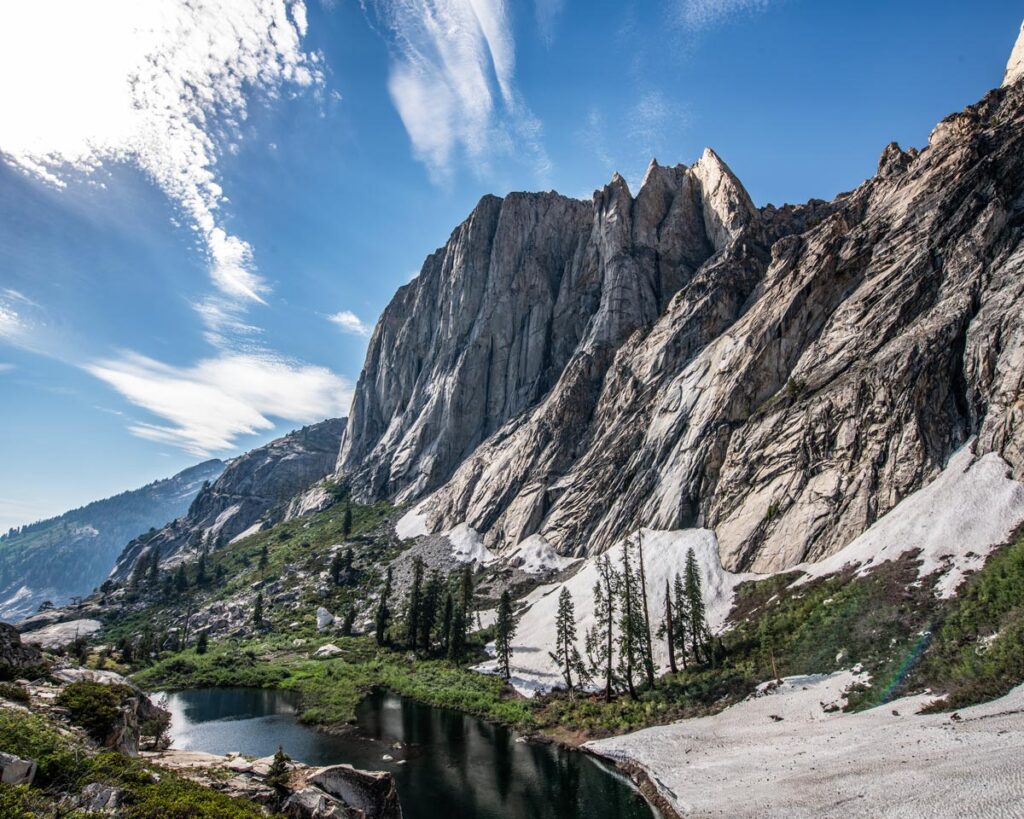
Once you’ve broken camp at Bearpaw, continue on your way past the High Sierra camp. The first few miles to Lone Pine Creek hug the cliffside, with a moderate descent most of the way (about 600’ total).
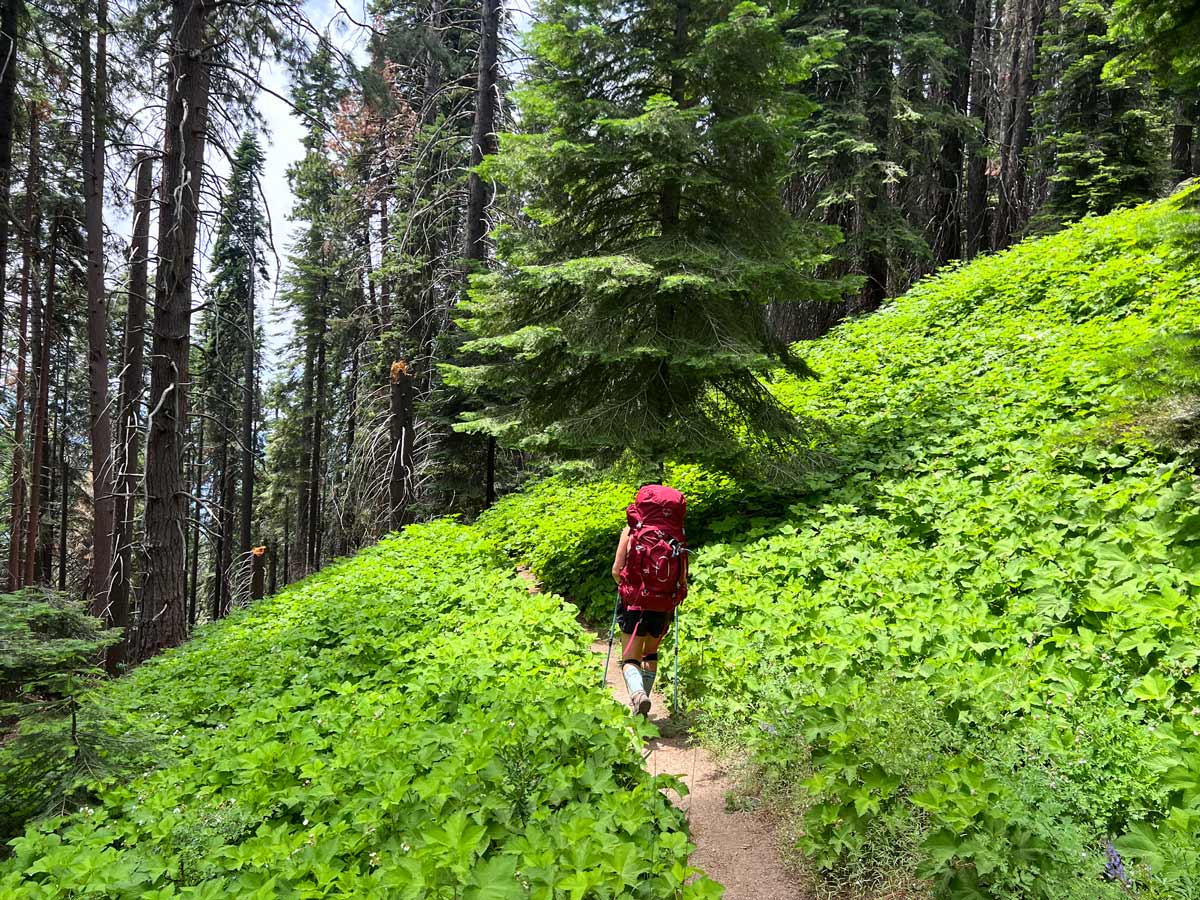
Frequently shaded, this stretch of trail is positively verdant in the summer months. It looks straight out of a story book, with brightly colored wildflowers, emerald grasses, and tinkling streams that offer a cool respite any time you desire to wash off.
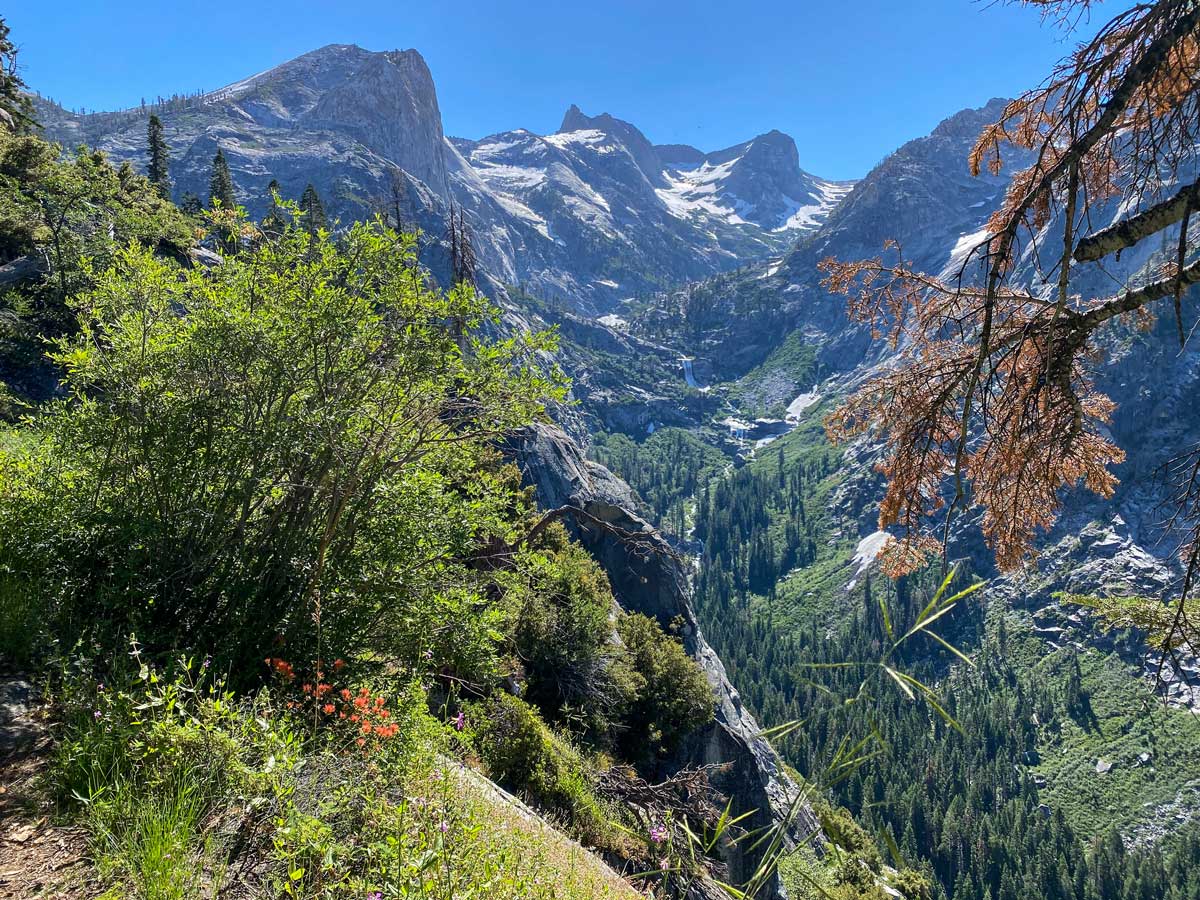
It’s here that you truly start getting into the heart of the dramatic Sierra backcountry. The peaks are more jagged, and the scenery is sheer splendor any way you turn.
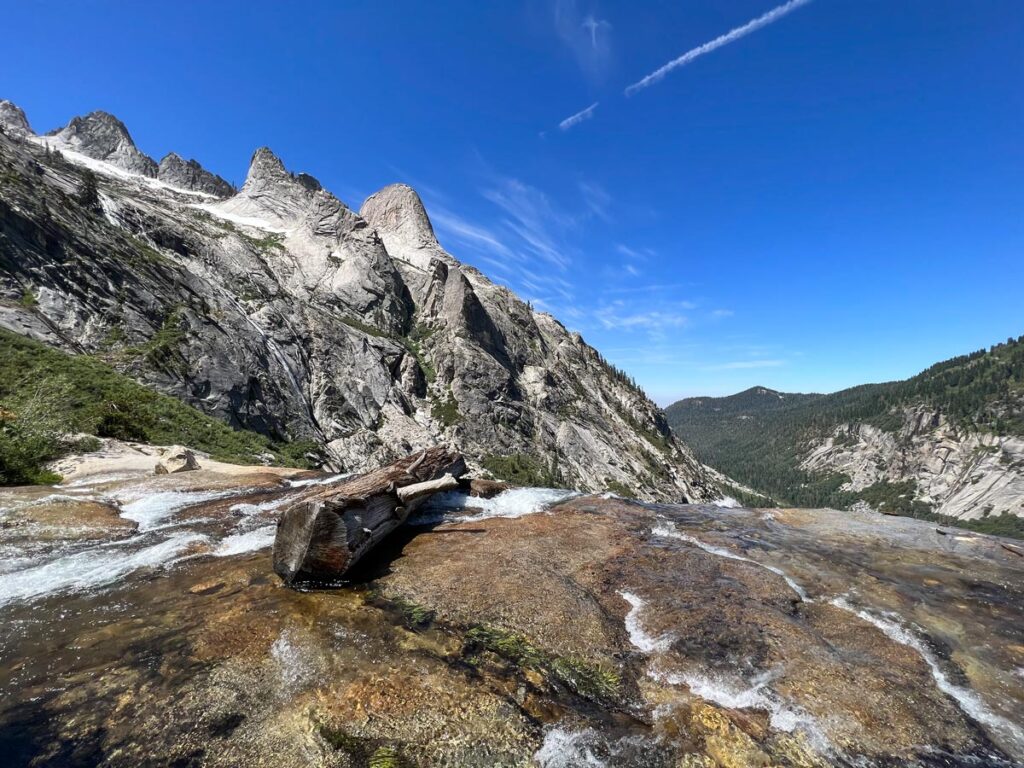
You’ll soon see a cascading waterfall, distant across the valley. That’s Hamilton Creek, and you’ll be crossing it before the day is over.
The valley is essentially a giant U, and as the path opens up to more exposed rock, the trail develops a more pronounced descent as you get close to Lone Pine Creek. You’ll cut down carved granite steps, before crossing Lone Pine Bridge high above the river gorge.
On the other side of Lone Pine Bridge, the ascent starts in earnest, with 1,000’ gain in the last 2 miles. This stretch is unforgiving, compounded by the dry, rocky trail. Just keep your head down and your feet going up…
With approximately 1 mile to go, you’ll reach Hamilton Creek. As with Mehrten, this can be a challenging river crossing, especially after a heavy winter. Look for fallen logs slightly upstream, which make the crossing easier than it initially appears.
In recent years, one particularly stable log has fallen onto an island of sorts, in the middle of the stream. Tight-rope walk across the log to the island, where you’ll bushwhack through 10–15 feet of dense foliage. Here, you’ll find an easier crossing to the far bank.
On the far side of Hamilton Creek, you’ll cover a few switchbacks up the hill, but the worst is behind you. At the fork, follow the trail marker to the right.
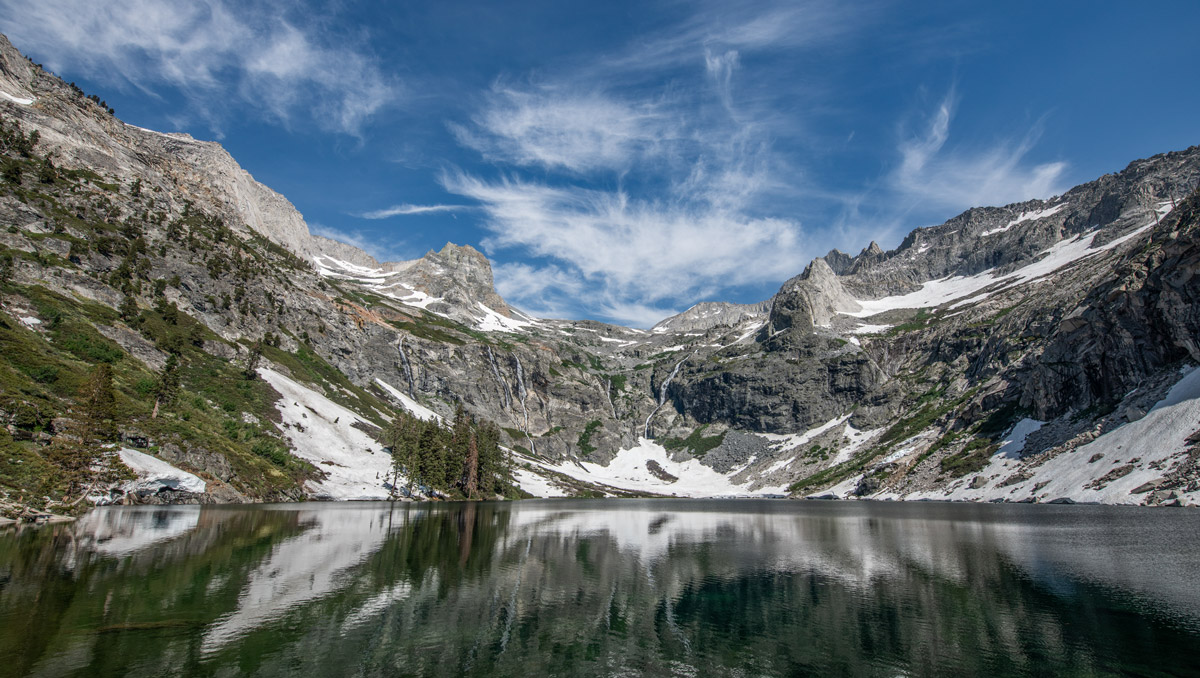
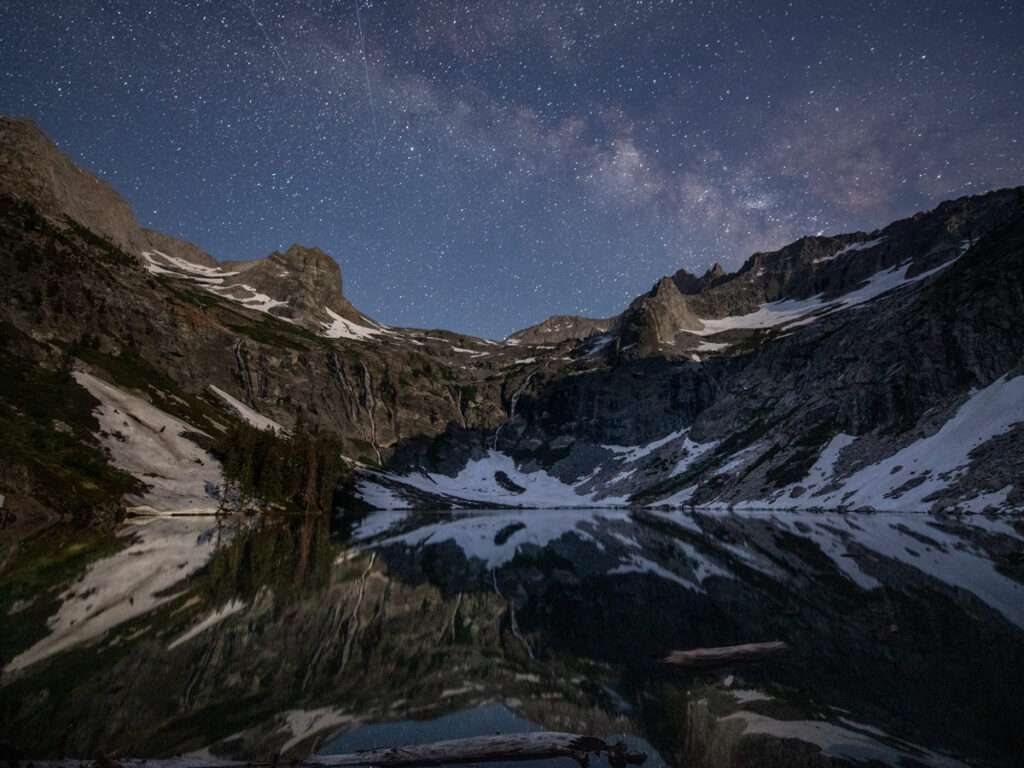
As you round the bend, Lower Hamilton Lake teases, but this is simply the appetizer. After one last little climb, you’ll crest the hill and drop to the banks of Hamilton Lake. Note the towering monolith known as Valhalla on the left!
You’ll likely share Hamilton Lake with a few other groups tonight, but it’s easy to find your own slice of solitude along the ample shoreline, or back in the small grove of trees bordering the creek.
Stake your claim, set up camp, and then enjoy idling the day away in the grandeur of the High Sierra.
Camping at Hamilton Lake
A few notes on camping at Hamilton Lake:
- Because of its popularity, there is a one-night limit on camping at Hamilton Lake.
- A pit toilet is located about 100 yards away from shore. Head back towards the way you came in; on your left, there’s a slight rise above the trail. Clamber up the hill, and you’ll find the toilet tucked away there.
- Multiple metal bear lockers are available.
- Keep an eye on your gear! Furry thieves are common, as the local salt-deficient deer will swipe any sweaty gear left unattended.
Day #3: Hamilton Lake back to Crescent Meadow (17 miles, 4,400’ elevation gain and 5,980’ loss)
By now the trail is familiar to you, so there’s not much to note as you return the way you came, to your vehicle and civilization.
With a long day ahead of you, it’s best to get an early start. Departing Hamilton Lake at 6:30 a.m., you still won’t make it back to your car before 3 p.m. or so, with stops.
If you’re prone to blisters on long hikes, expect to grow some today. Ensure your first aid kit is stocked with appropriate band aids and tape.
On this long stretch, I actually hiked the last 12 miles in my Xero sandals and hiking socks. I may not have won any fashion awards, but the shoes held up wonderfully on the trail and greatly preserved my feet!
High Sierra Trail Wildlife and Safety
Bears
California black bears are plentiful along the High Sierra Trail, and are very used to sharing their habitat with humans hiking in the area. Black bears are naturally skittish and much less aggressive than their grizzly cousins, but will still brazenly try to access a food source.
We (personally) have not encountered them at Hamilton Lake, where the landscape is harsher and more barren. But bears frequent the shaded forests and meadows along the trail; we’ve seen them near Crescent Meadow, Bearpaw Meadow, and in the forested stretch between miles 8—9.
While camping at night, ensure that there is nothing scented in your tent (including the lip balm you forgot was in your pocket).
Remember to stash your bear canister 100+ yards away. Wedge it tightly between rocks, logs, or otherwise make it challenging for bears to access. Never store your canister near a cliff or running stream, as bears could knock it off the hill or down the river.
Rattlesnakes
Rattlesnakes also reside in the Sierra, and there is a chance you may see one sunning itself on the trail.
Stomping your feet will notify snakes of your approach (they can feel the vibrations). Always keep an eye on the trail ahead of your feet, and be careful stepping down off the backside of rocks.
If you see a snake, don’t make any sudden movements. Back up slowly, and give it a wide berth as you go around it.
Other Wildlife
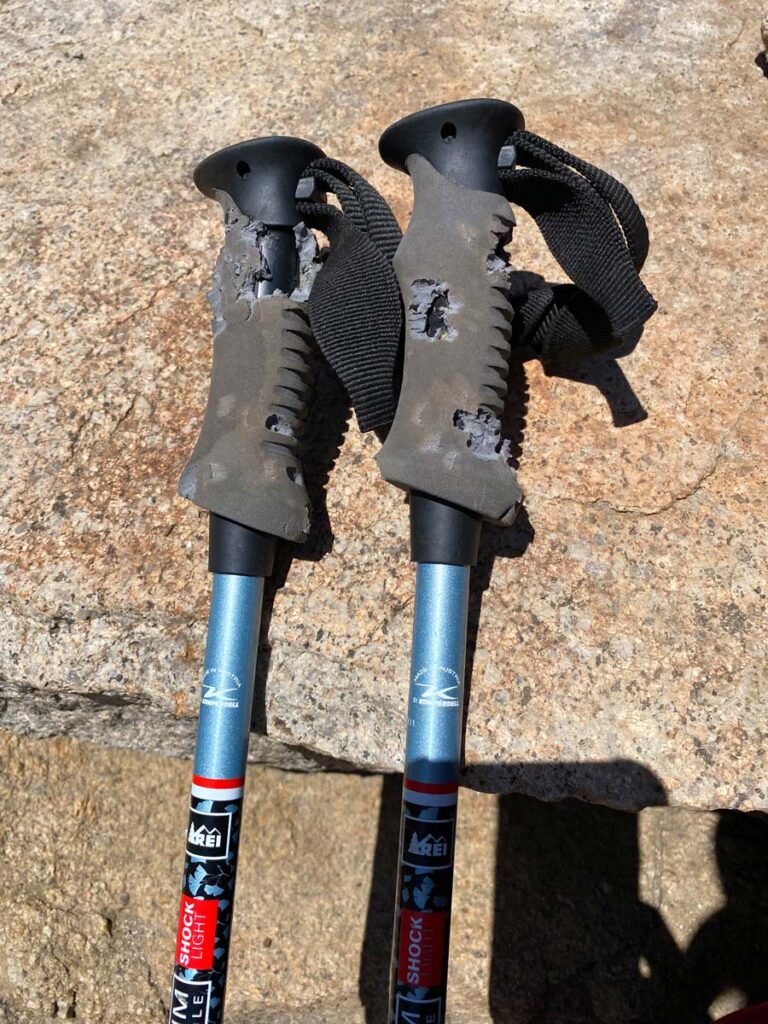
Deer and marmots are common, especially at Hamilton Lake. Here, the deer are salt-deficient, and will boldly swipe any sweaty clothing left unattended.
Even my trekking poles weren’t safe, as I left them for 10 minutes and came back to shredded handles. Judging by the size of the bite marks, even the marmots enjoy a salty snack…
Inclement Weather and Fire Safety
As with any trip into nature, always check the weather forecast before you depart, and talk with a ranger for further info.
Wildfires can also be common in the Sierra during the summer months (usually picking up in August). Familiarize yourself with current blazes at the interactive Cal Fire Incident Map.
Always bring a GPS when going into the backcountry. These handy devices help expedite search and rescue should you get injured, lost, or otherwise trapped.
We personally like the Garmin inReach Mini. It’s tiny, has an SOS button to alert rescuers of your location, and even lets friends and family back home watch your progress. The Garmin inReach is pricey – typically running $400. However, you can sometimes find Amazon resellers posting it in the $250 range, along with many other cheaper options.
If you’re looking to acclimate prior to starting the High Sierra Trail, check out our recommendations for the best easy and moderate hikes in Sequoia National Park. They’re a great warmup to stretch your legs and open your lungs at altitude, prior to starting the HST.